


What do you say we start this week off with a tutorial for us hot mess mamas? Fabric Paper Glue is filled with DIY accessories for you like this Art-Inspired Chevron Tote Bag Tutorial and Pink + Wood Bib Necklace Tutorial. These Flourished Chalk Cloth Coasters Tutorial would make a great gift for a fellow mama you know. Today though, it’s all about this cute Stripes + Color Tote. It’s one of the prettiest totes I’ve seen all summer and is surprisingly easy to do.
Let’s get to it…
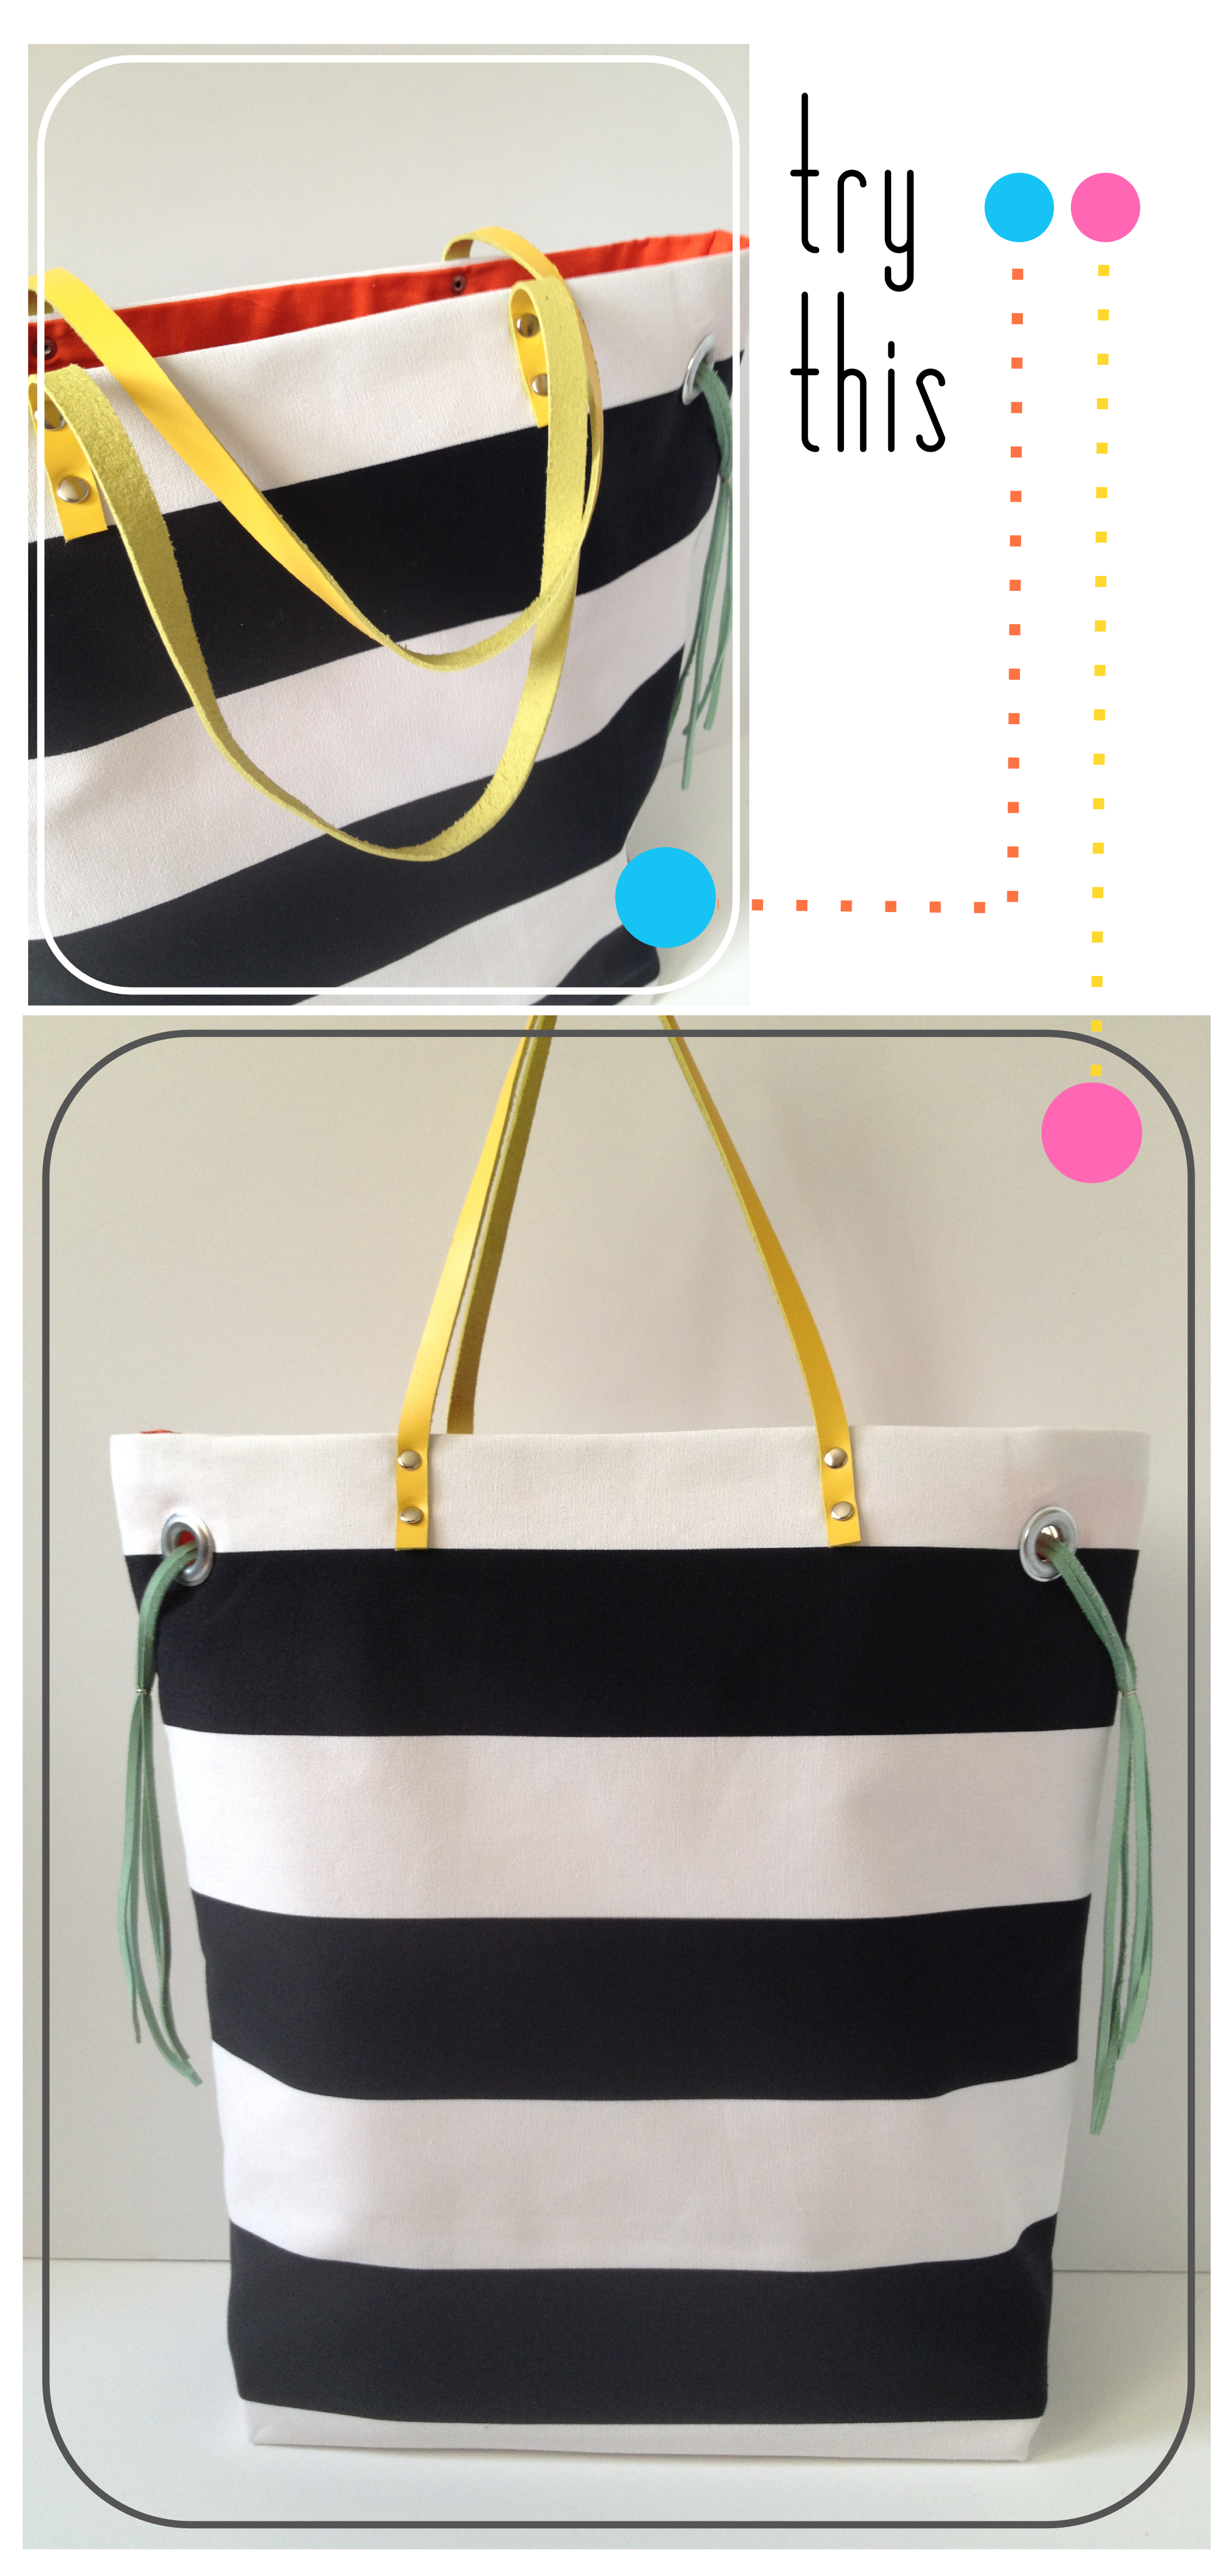
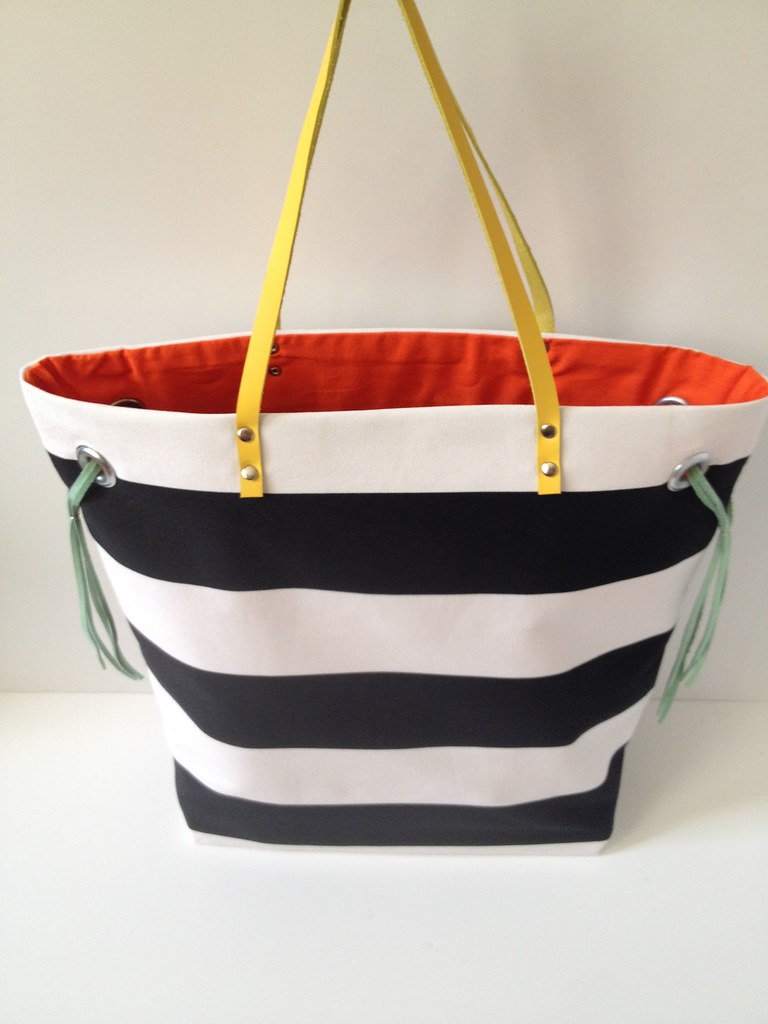
Try This: Stripes + Color Tote Bag
I’m in love with this project. It looks really advanced, but the sewing itself is absolutely basic. It does apply some techniques like rivets and grommets that I hadn’t actually used before this project, and I can assure you that you shouldn’t be intimidated by them. In fact, they were so easy that my head is sort of twirling with ideas of other projects on which I can put these bad boys to use.
Before you get started, I would also note that you don’t have to use a striped fabric like this one, but using a big bold black and white pattern will give the colored details a special little pop that makes the bag unique.
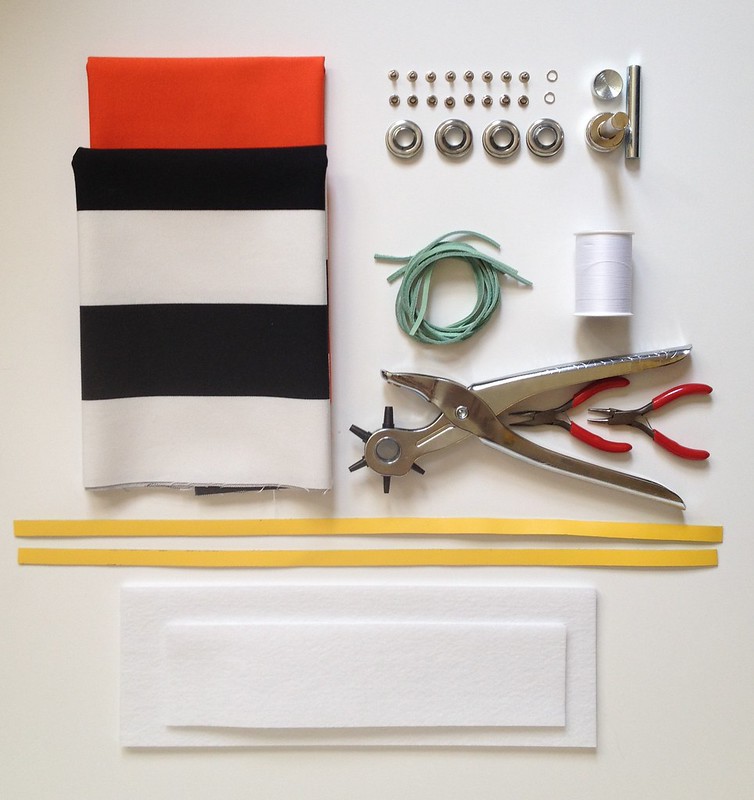
Materials:
4 – Large Grommets (and installation tools)*
8 – Small Rivets (and installation tools)*
Hammer
Hole Punch
4 – 18″ Leather Laces
2 – 18″ x 1/2″ Leather Straps**
2 – Jewelry Jump Ring (or other small metal rings)
Pliers
Thread
Sewing Machine
2 – 16″ x 17.5″ cuts of a heavy canvas-like Bold Striped Fabric (with the stripes running parallel to the shorter side)
2 – 16″ x 17.5″ cuts of a Bright Solid Fabric for the lining
1 – 13″ x 9.5″ cut of the the Bright Solid Fabric
3 – 4″ x 12″ cuts of Super Heavy Interfacing
2 – 2.5″ x 10″ cuts of Super Heavy Interfacing
*Most grommets come with the installation tools you’ll need for them (except for a hammer). For the rivets, you can buy a starter kit (like this one) that includes a variety of rivet sizes and the tools you’ll need to set them (again, except for a hammer).
**Unfortunately, I don’t have a home run source for brightly colored leather strapping. I ordered mine from Etsy seller all 4 handmade, but I wish they’d offered the bright colors in wider straps.
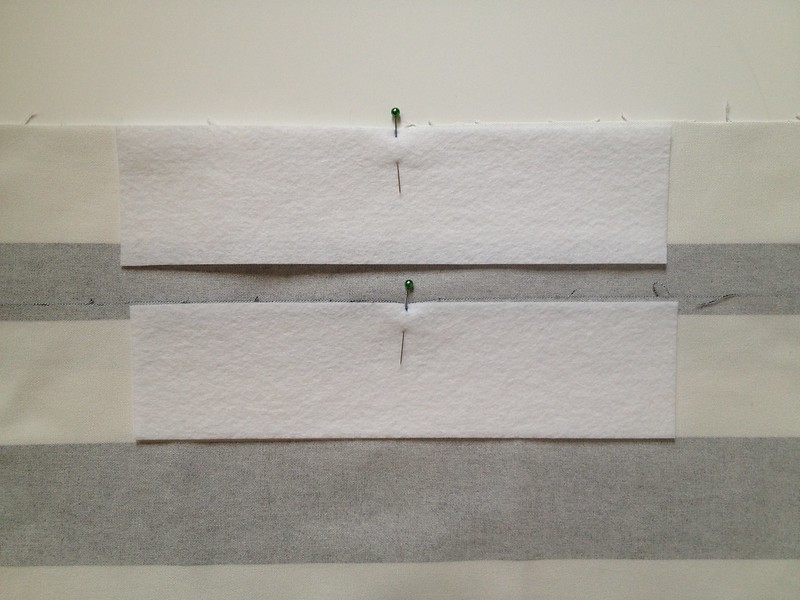
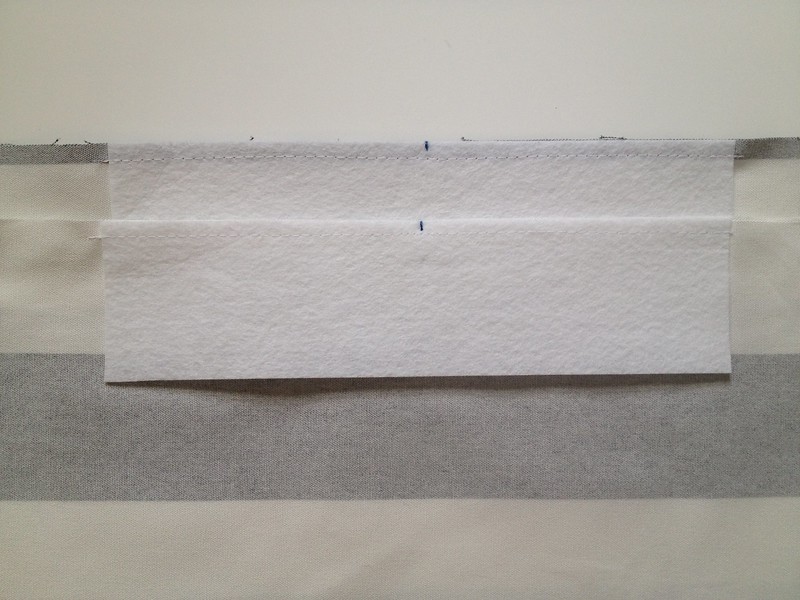
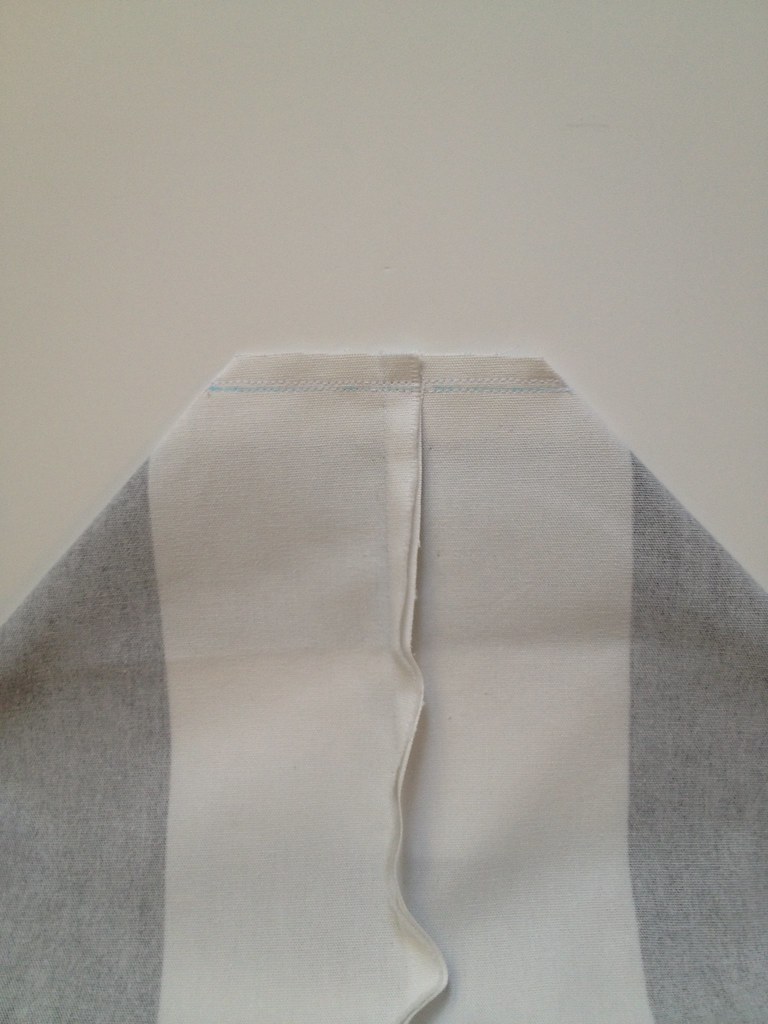
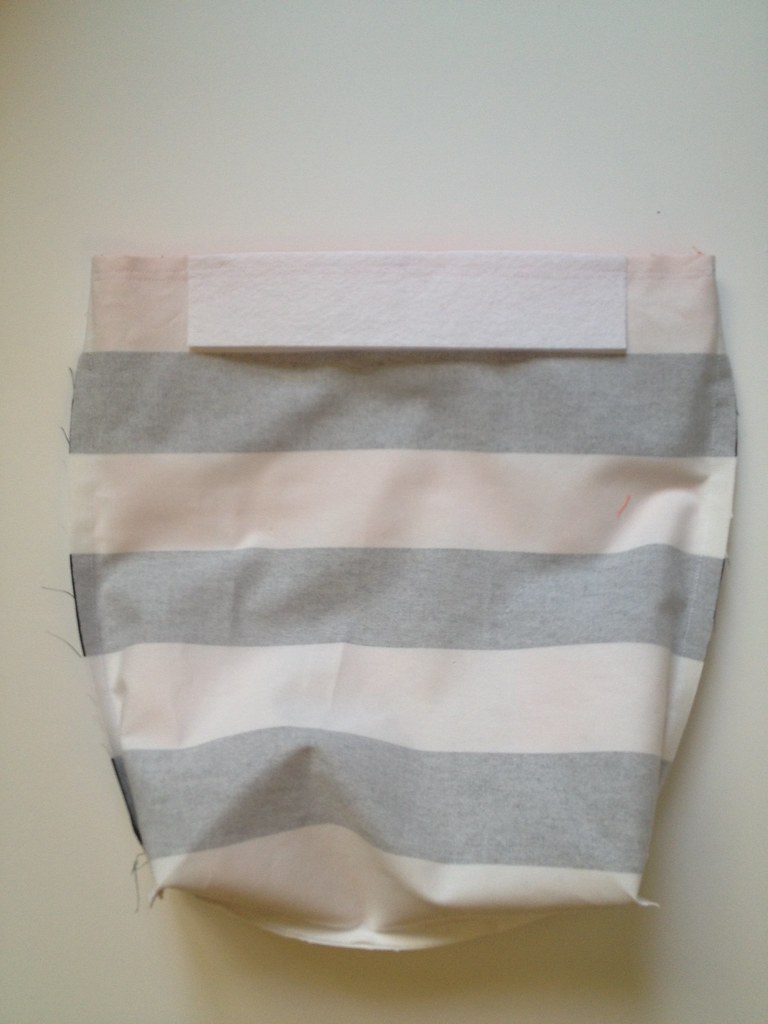
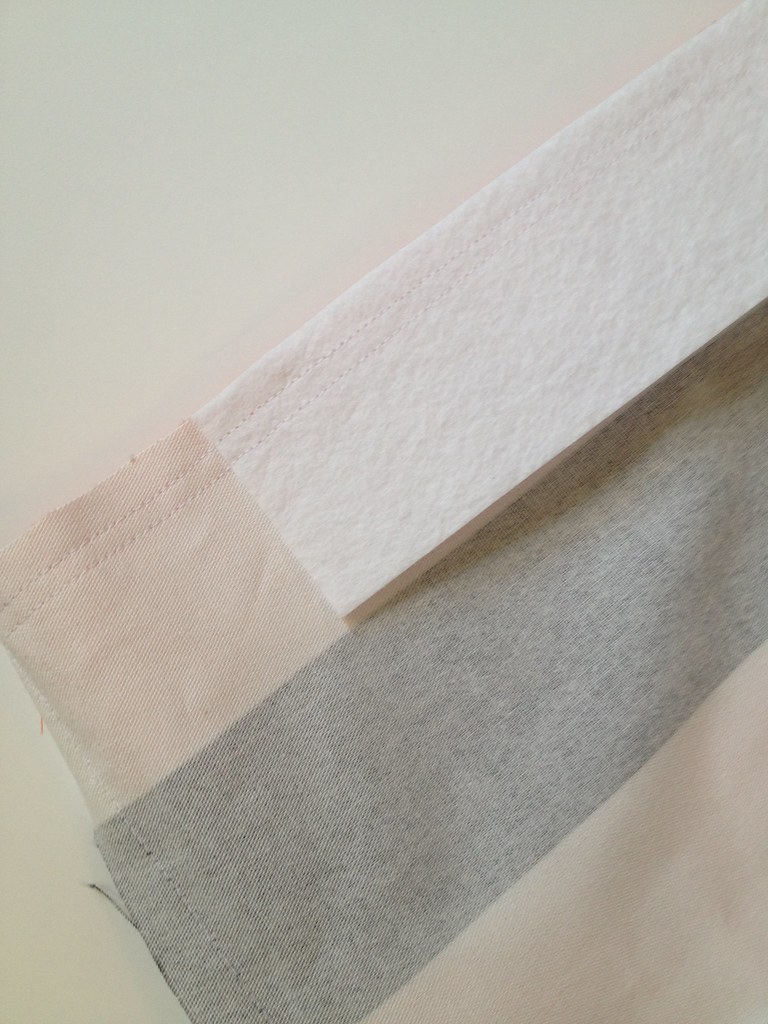
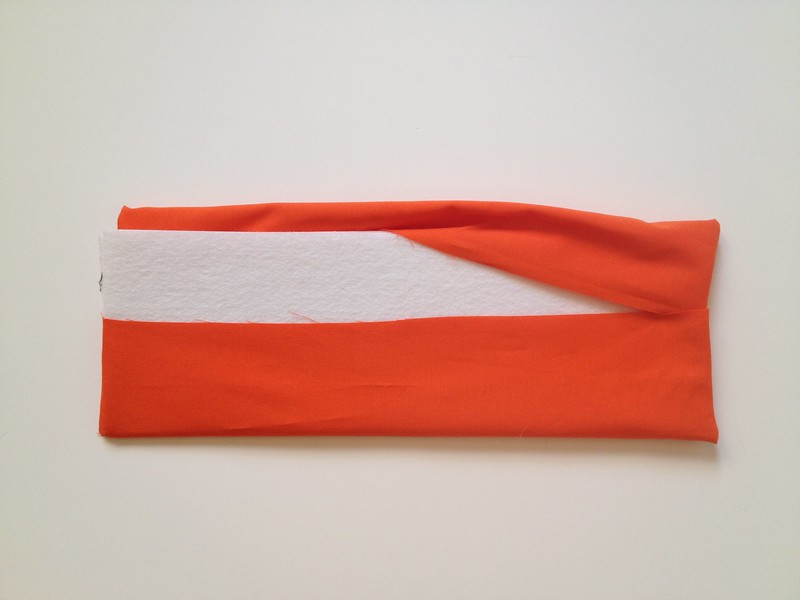
Directions: Center, pin, and stitch each of the 2.5″ x 10″ cuts of heavy interfacing to the top, back edge of each of the cuts of striped fabric.
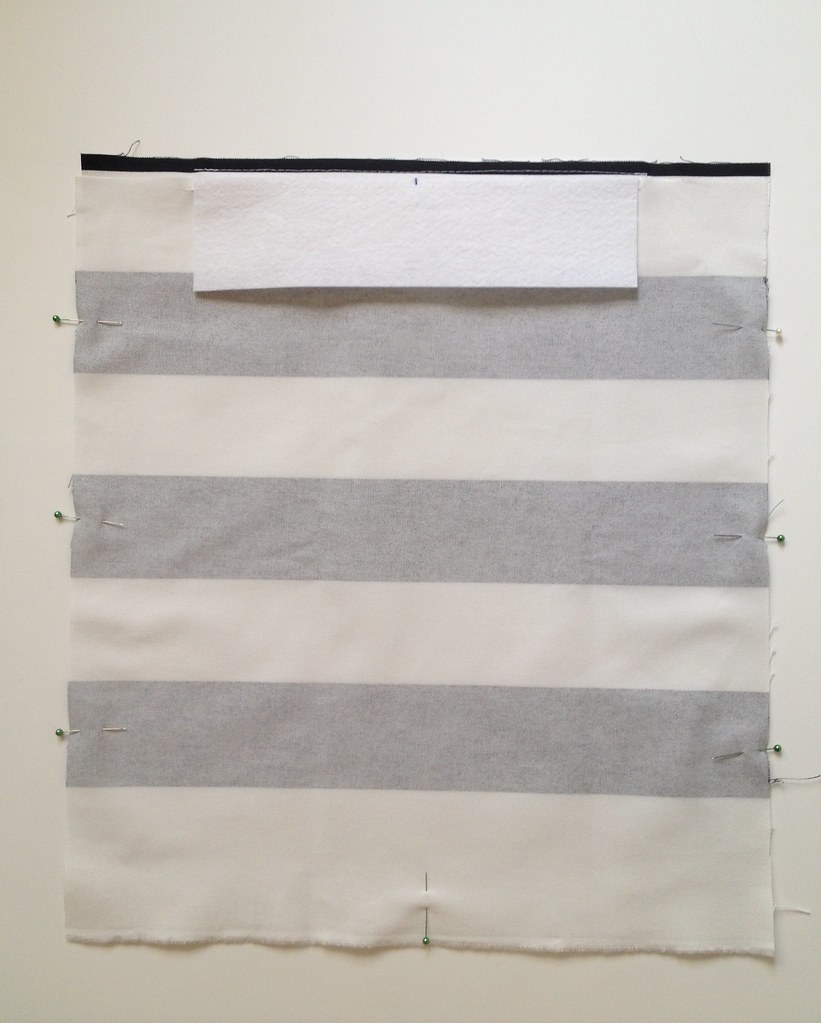
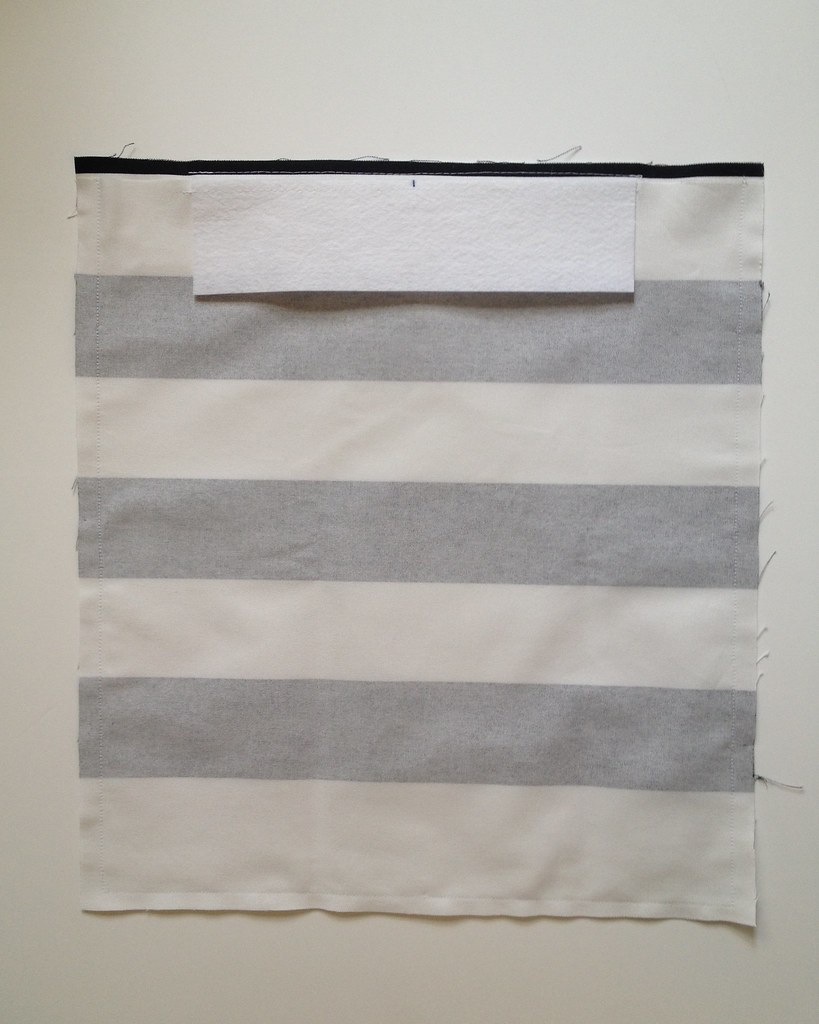
Pin the two cuts of striped fabric together with the right sides facing one another. The top edge with the heavy interfacing will be the bag’s opening. Sew around each of the bag’s other three edges.
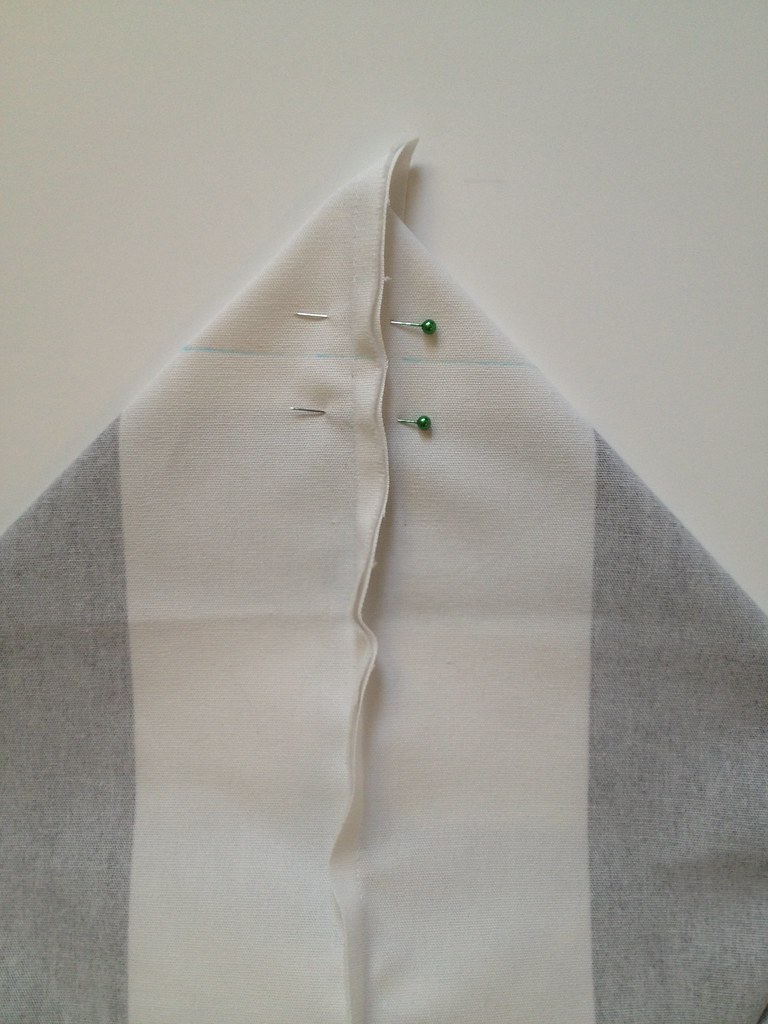
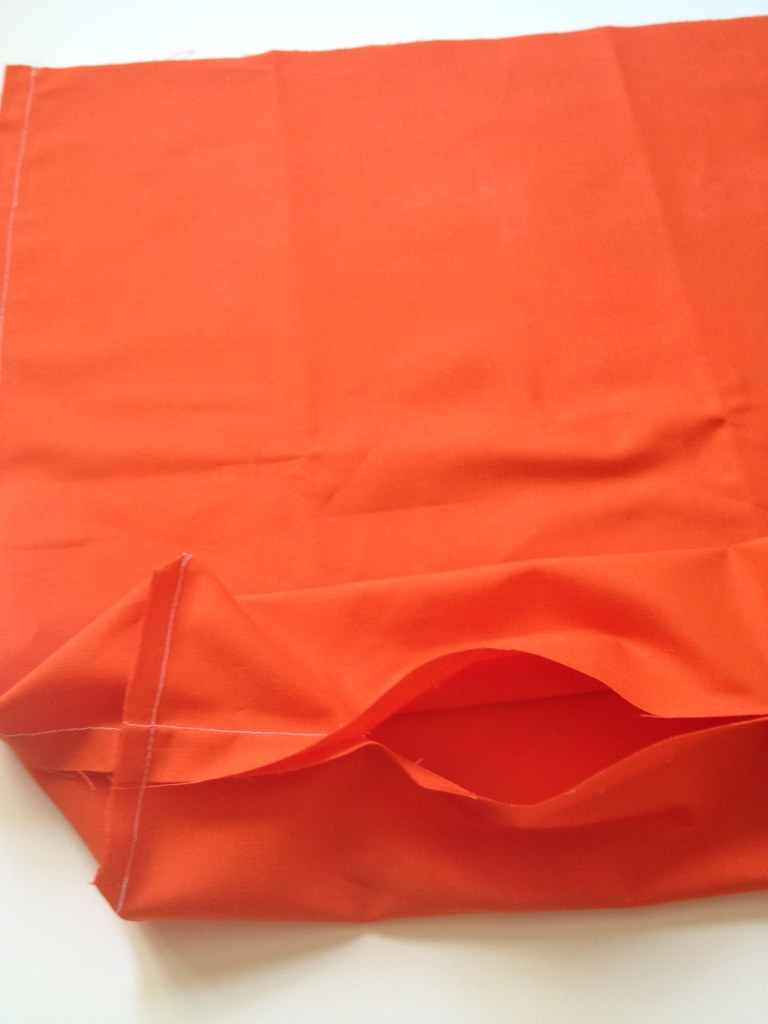
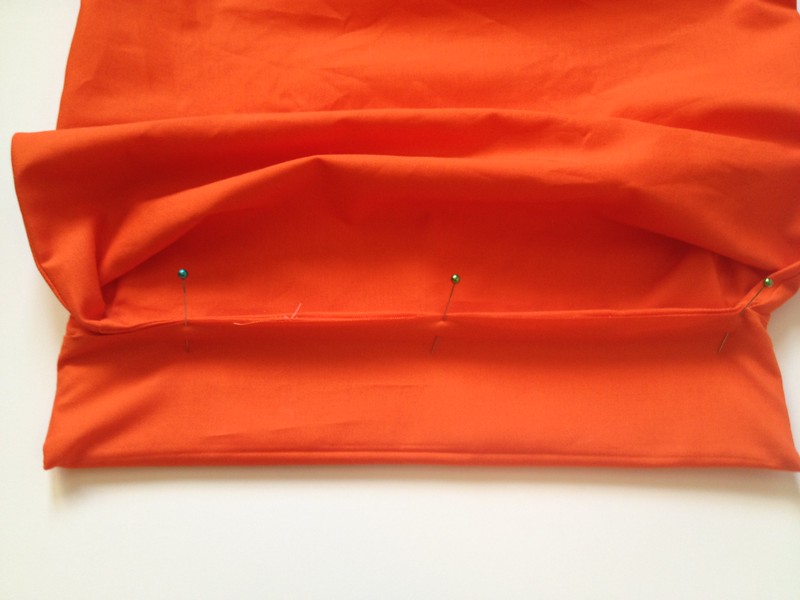
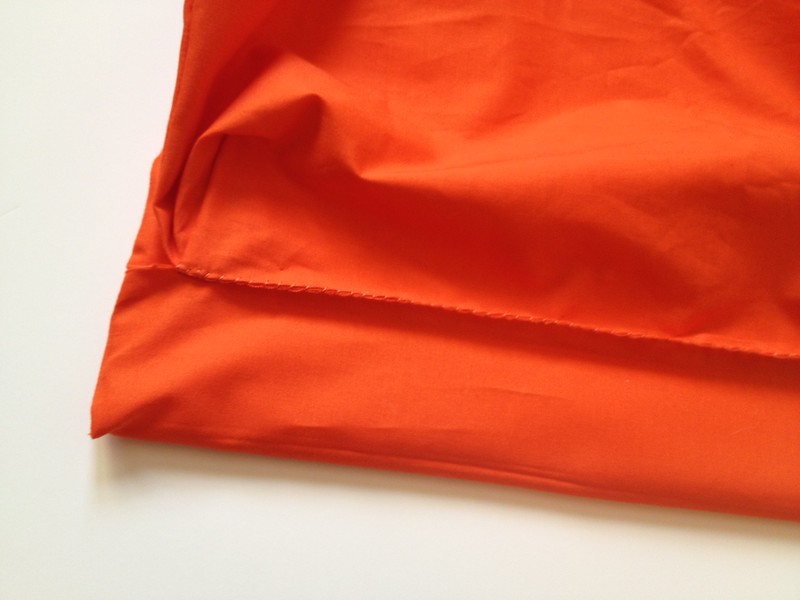
Box the corners to give the bag some shape by forming a triangle at the corner edge such that the bottom and side seams are touching. Mark a line perpendicular to the seams about 3″ from the corner. Stitch on this line and trim the excess fabric.
With the exception of the first step involving the heavy interfacing, repeat these steps with the lining fabric, but leave a hole about 3″ wide in the bottom seam to pull the bag right-side-out once you’ve stitched everything together.

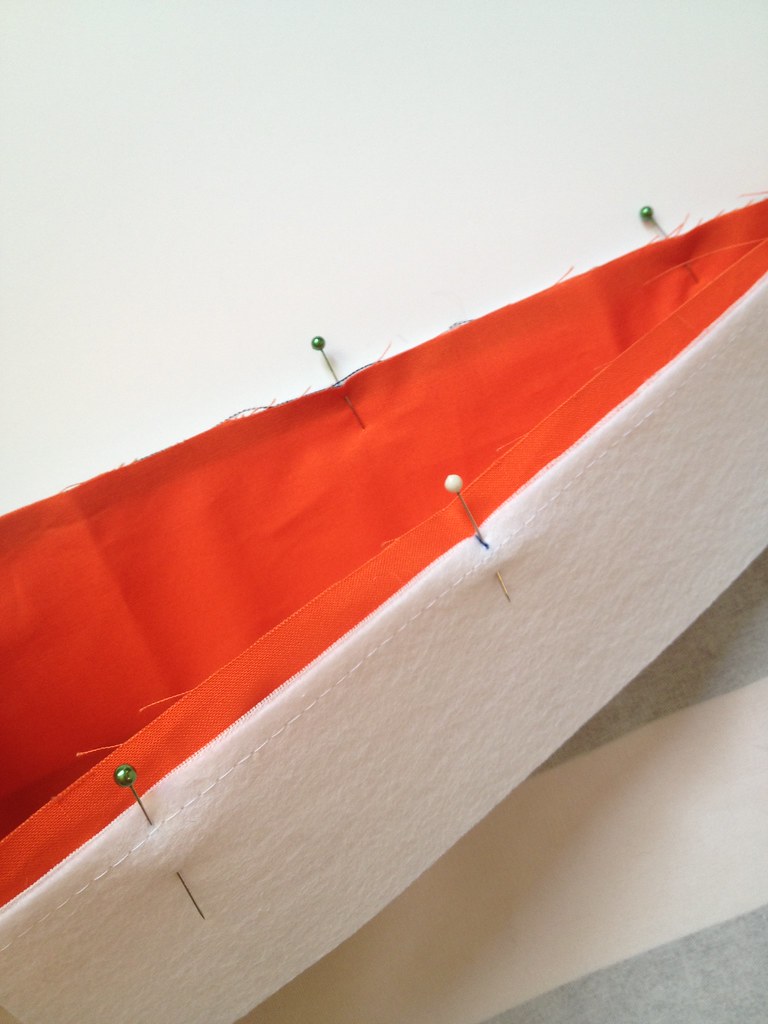
Place the lining inside of the outer bag. The right sides of both components should be facing one another. Pin and double stitch them together around the top.
Pull everything through the hole you left in the lining.
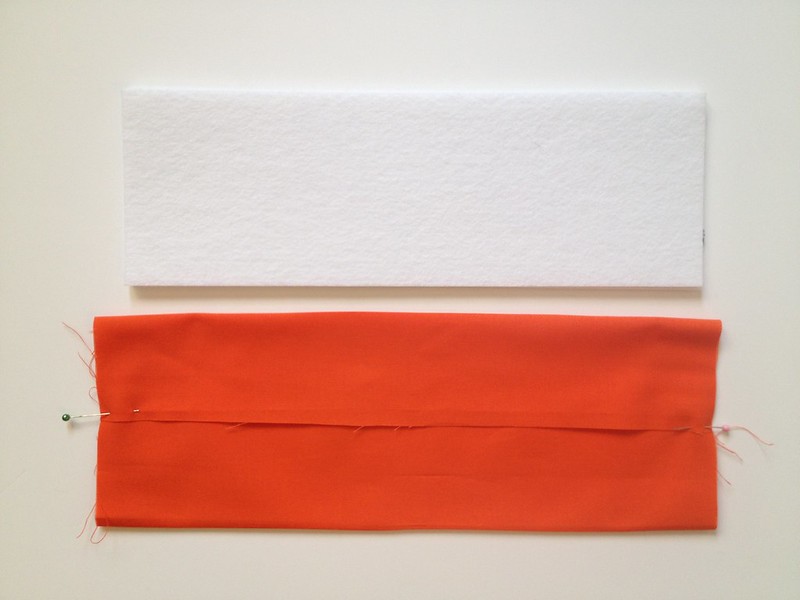
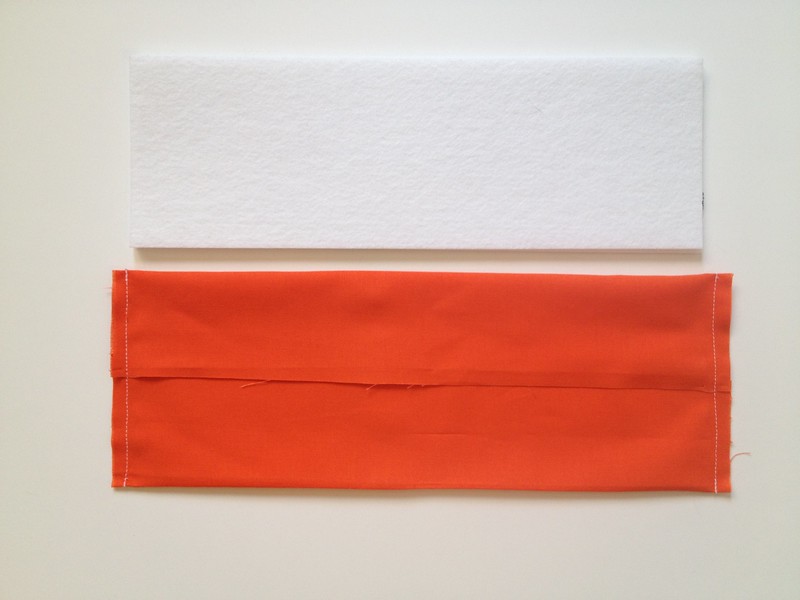
To give the bottom stability, create a panel to attach to the bag’s lining. To do this, take the 13″ x 9.5″ cut of lining fabric and fold it into thirds such that it ends up being 4″ wide like the remaining heavy interface pieces and the fabric overlap is centered (see photos). Stitch along the two outside edges.
Turn the piece right side out, and slip in the remaining 4″ x 12″ interface pieces.

Take the edges of the opening of this bottom piece and pin them to the bottom seam of the bag’s lining. Stitch together. I did this step by hand, but feel free to do it on the machine if you can maneuver it.
Now tuck the lining in the bag, and press with an iron.
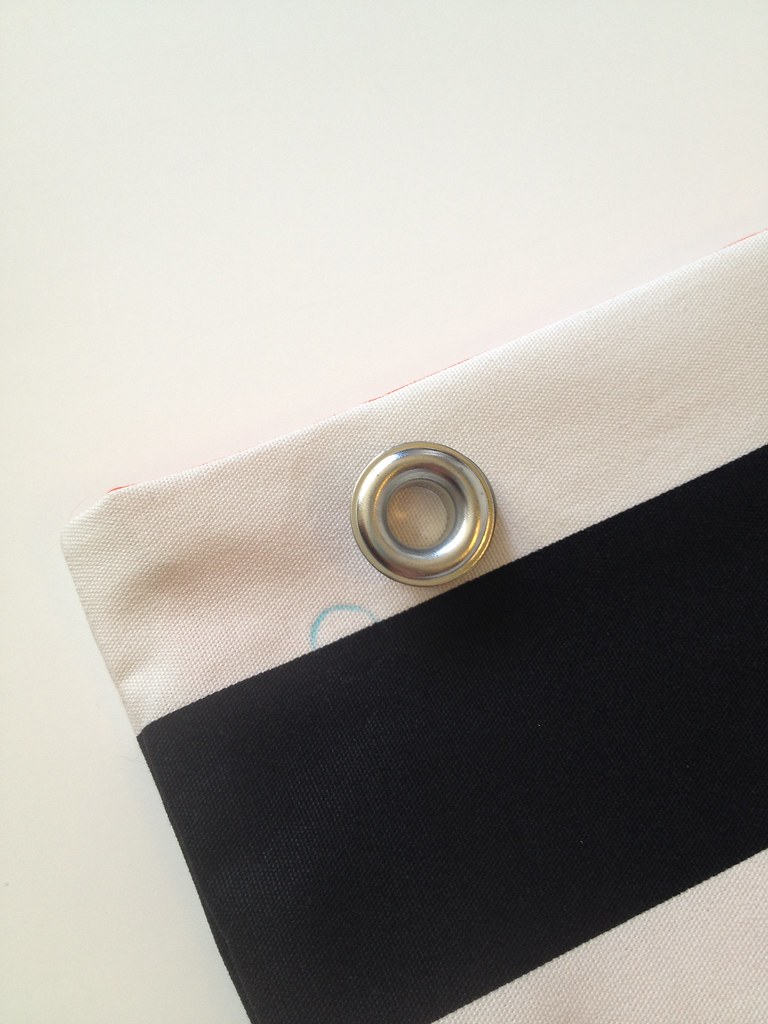
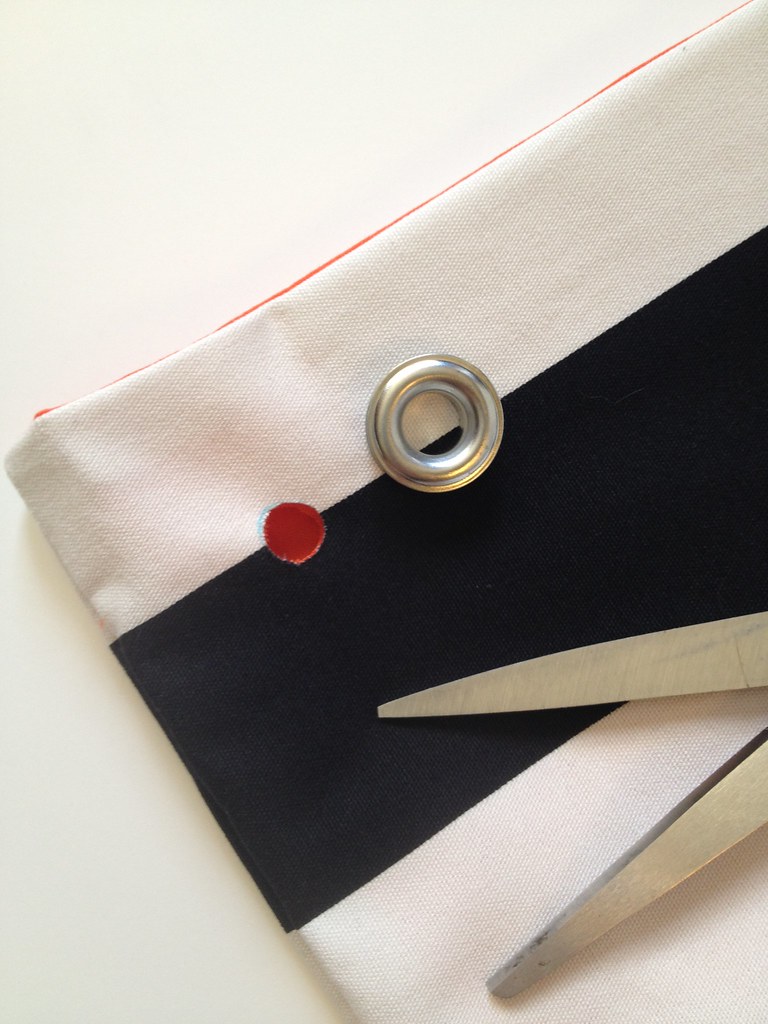
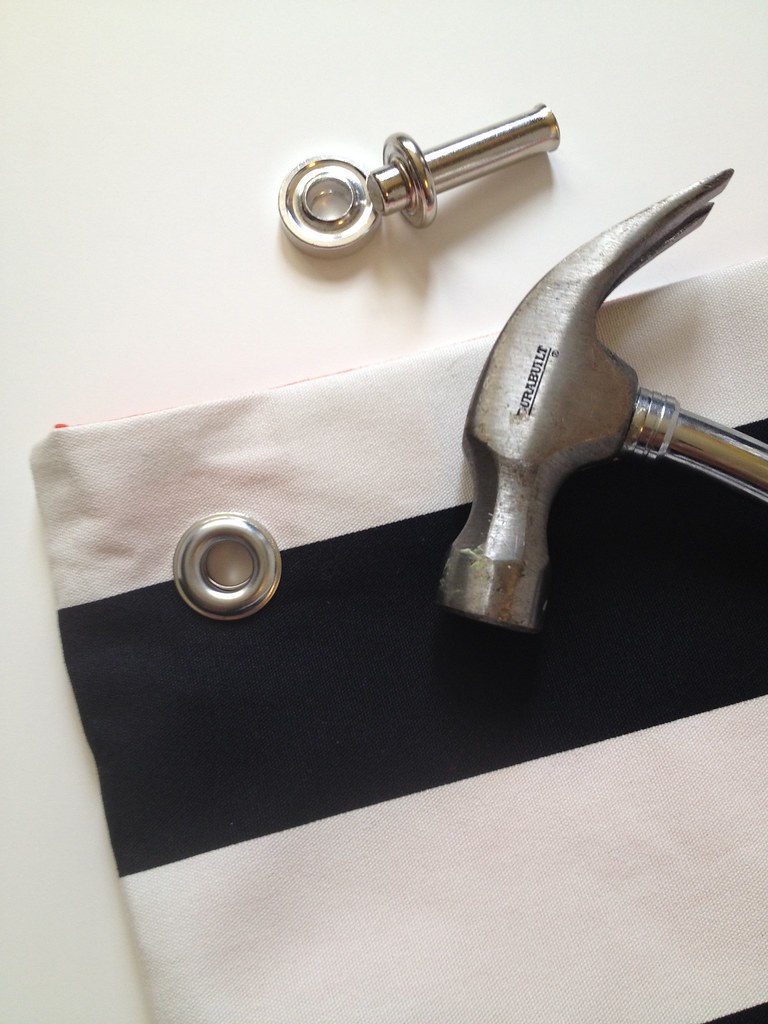
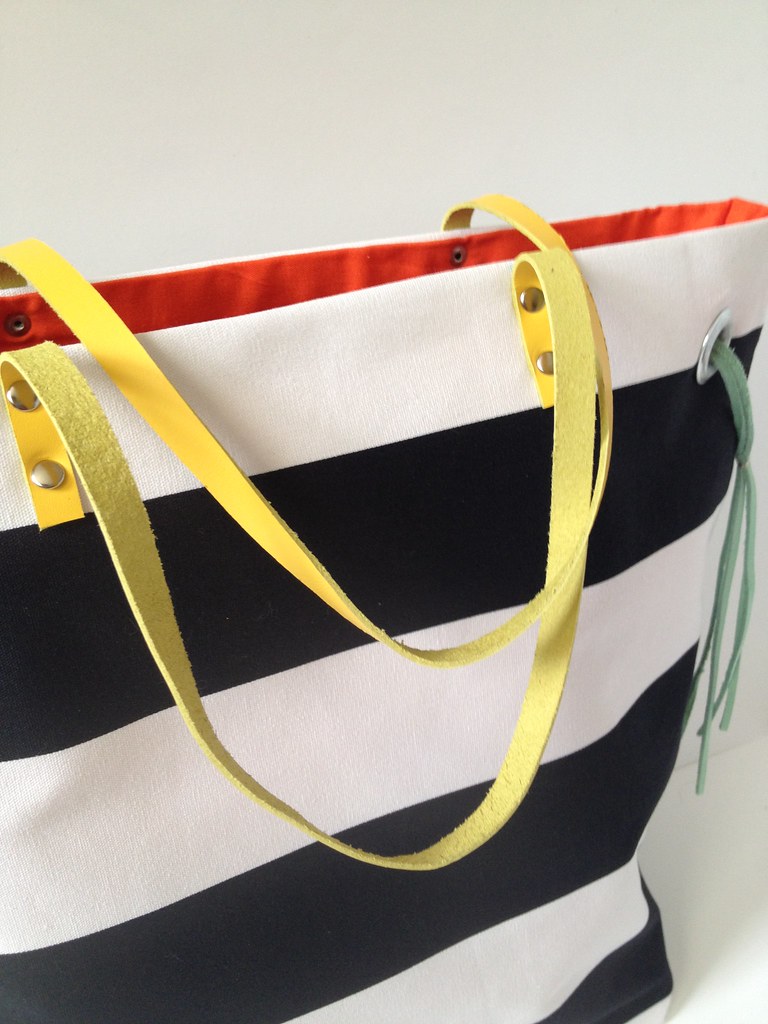
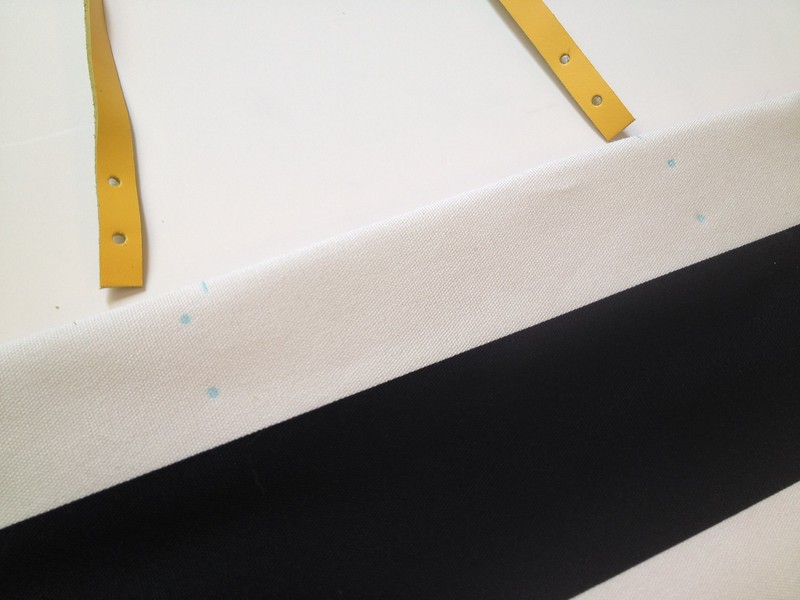
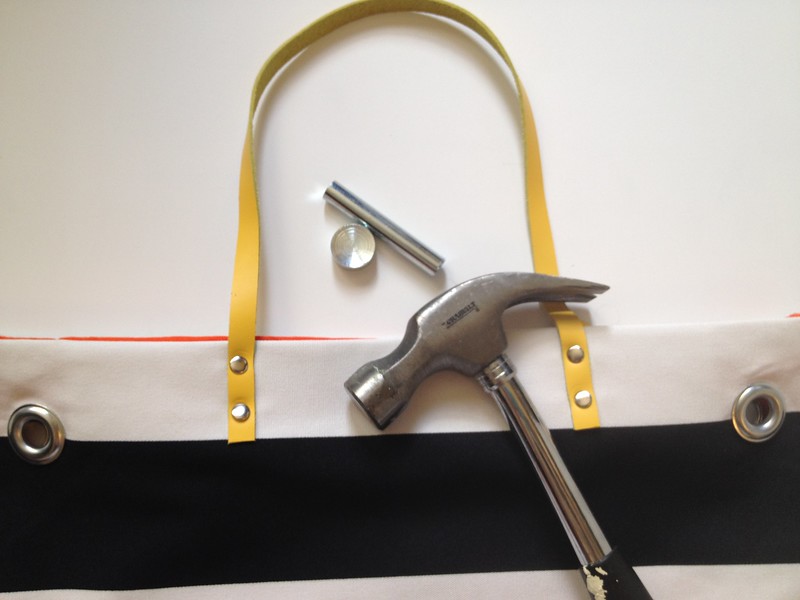
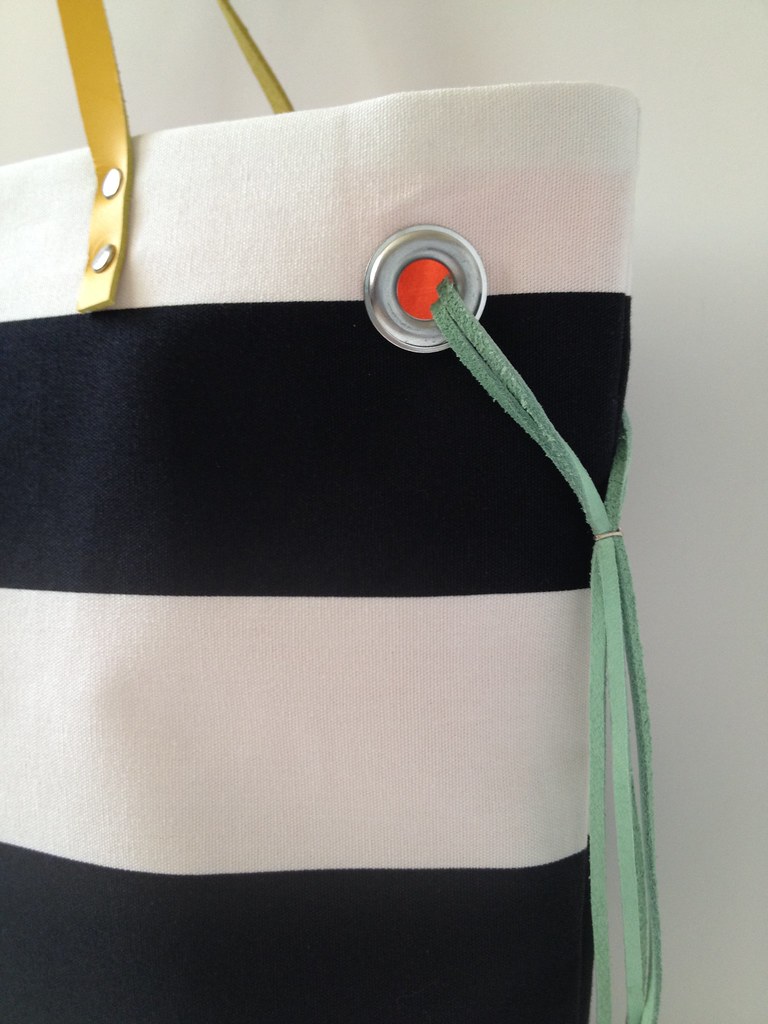
On one side of the bag, position one of the grommets about an 1.5″ from the top and side. Trace the inside of the grommet onto the bag and cut out. Install the grommet according to the directions on the packaging. You’re doing this just for a single side. Do not combine the two sides of the purse with the grommet. Like I said, this was the first time I’ve worked with grommets, and at first, I thought I was doing it wrong because it didn’t seem to be working. Just know that it took about 50 good whacks of the hammer for each grommet.
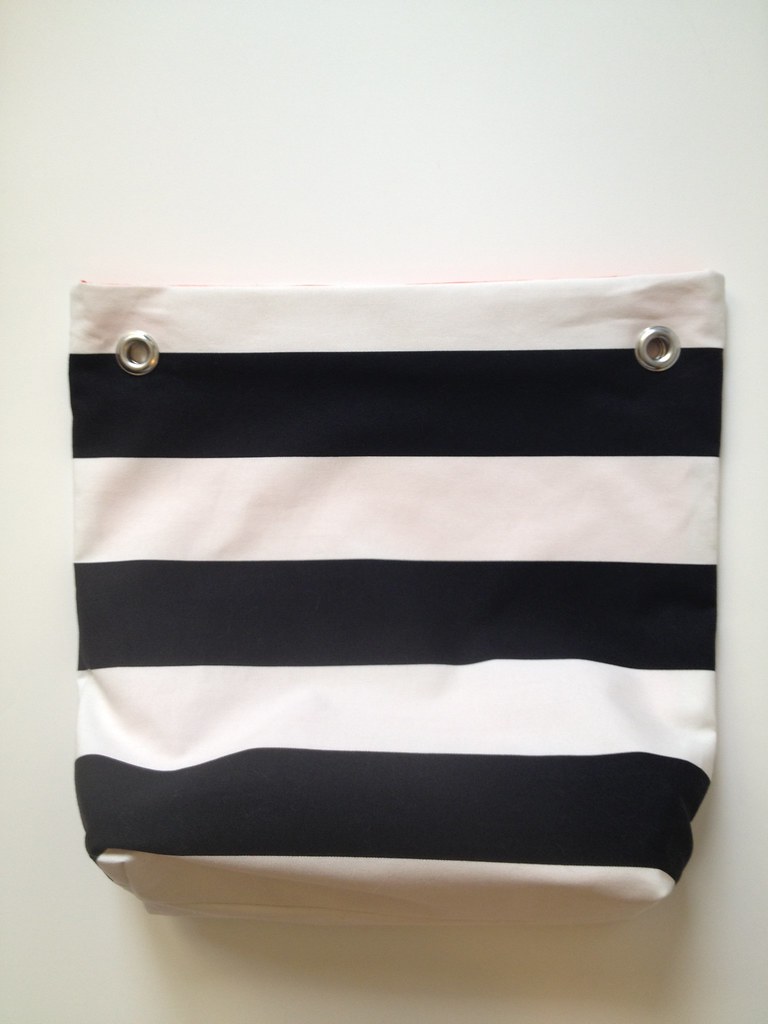
Repeat in the the other corner and on each corner on the opposite side.
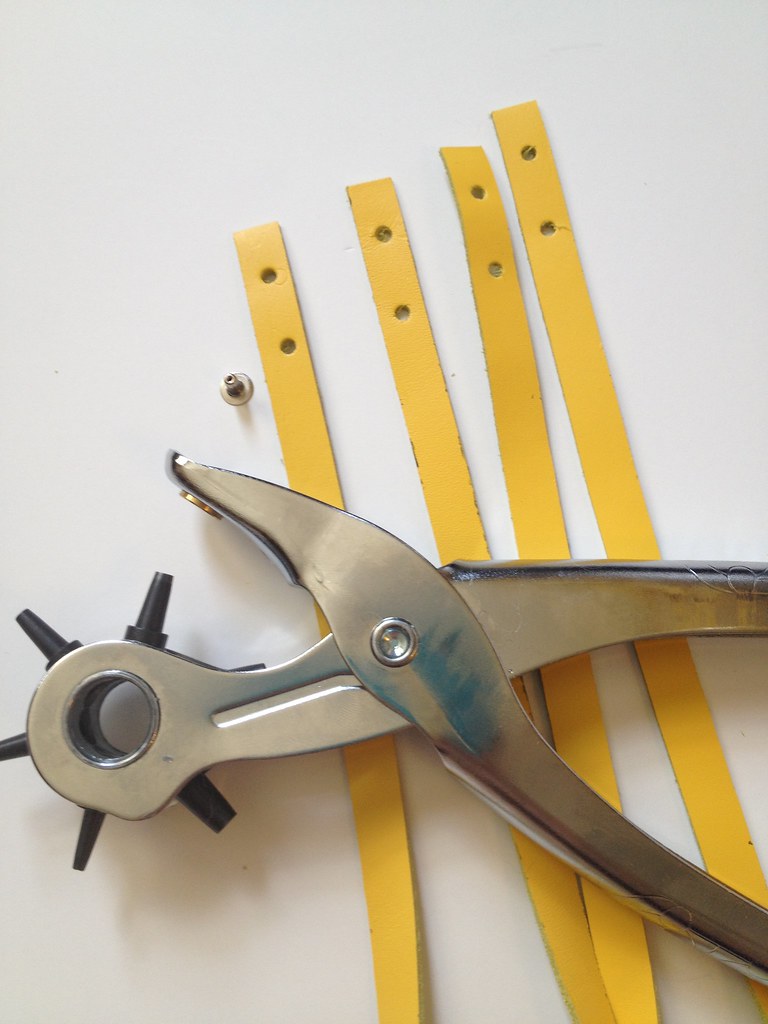
On each end of the 1/2″ wide leather straps, punch two holes just big enough for the rivet to slip through. The bottom hole on each end should be about a 1/2″ from the edge with the next one about 1″ from the edge.

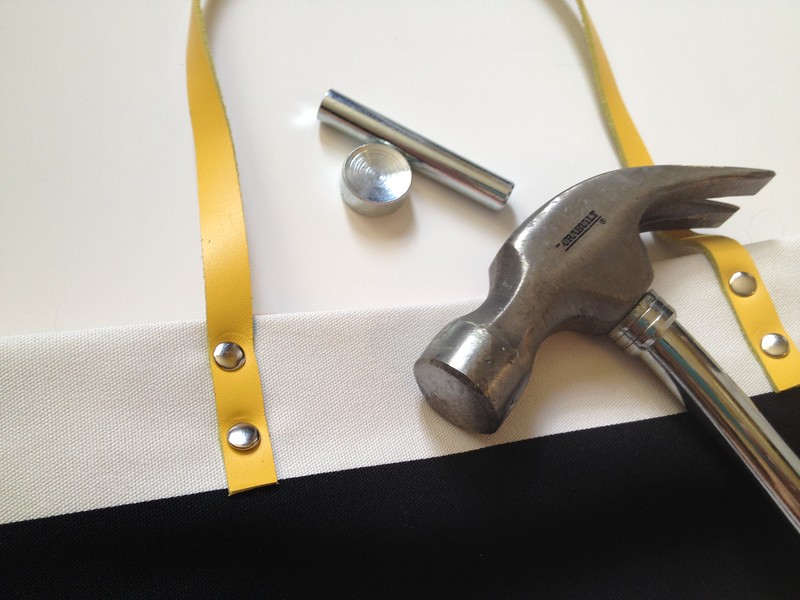
On each side of the bag, position the strap ends about 3″ from the bag’s center point, and place a mark where the holes in your strap ends are. You should be able to use your same hole punch to punch these holes in the fabric. The rivets that you use should only be about as long as the thickness of the fabric + straps together. Install the rivets according to the directions with your installation kit. I also watched this video, which I found really helpful. These are super easy to install and only take about 2 to 3 whacks of the hammer.
Repeat the strap/rivet installation process on the other side of the bag.
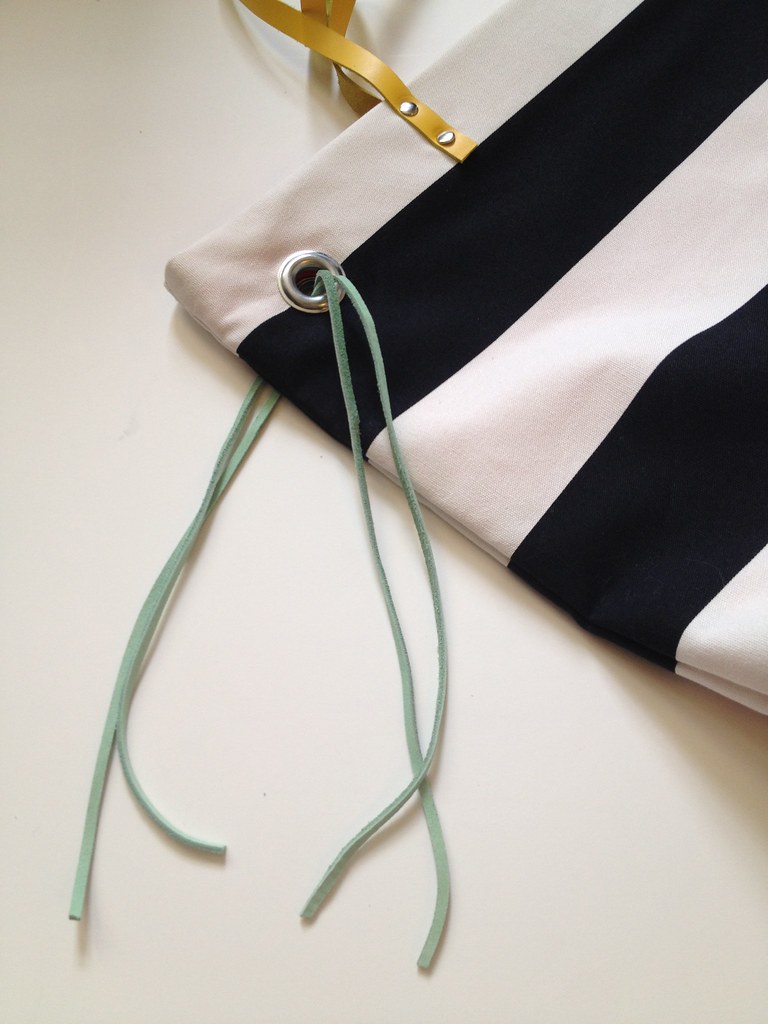
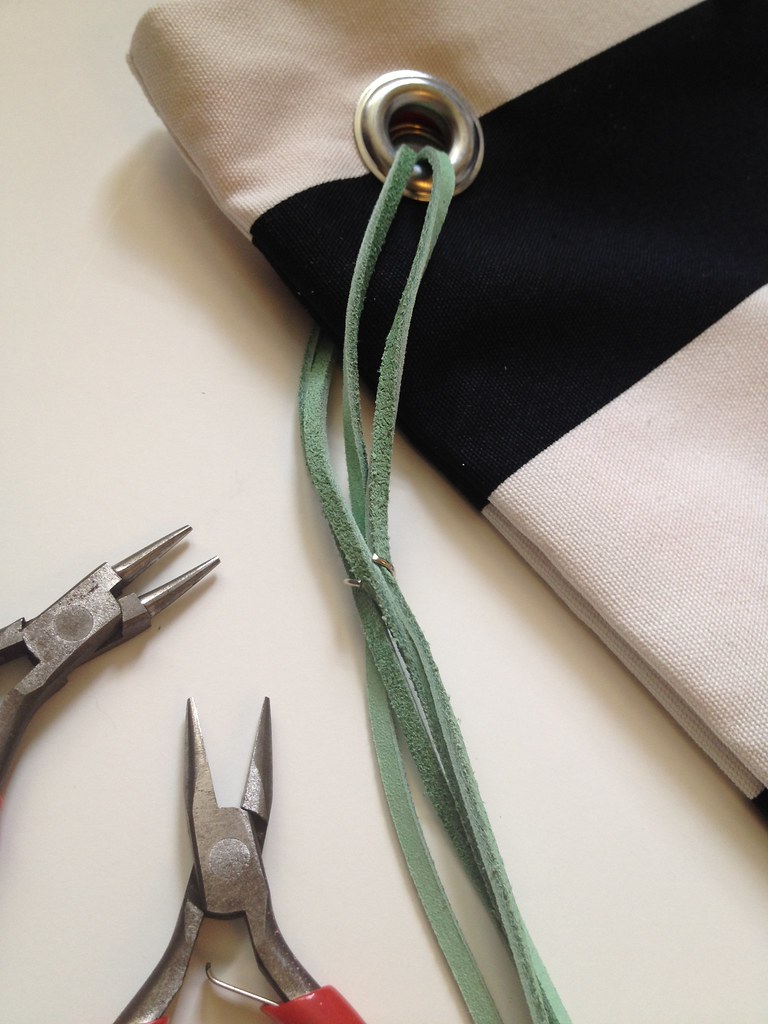
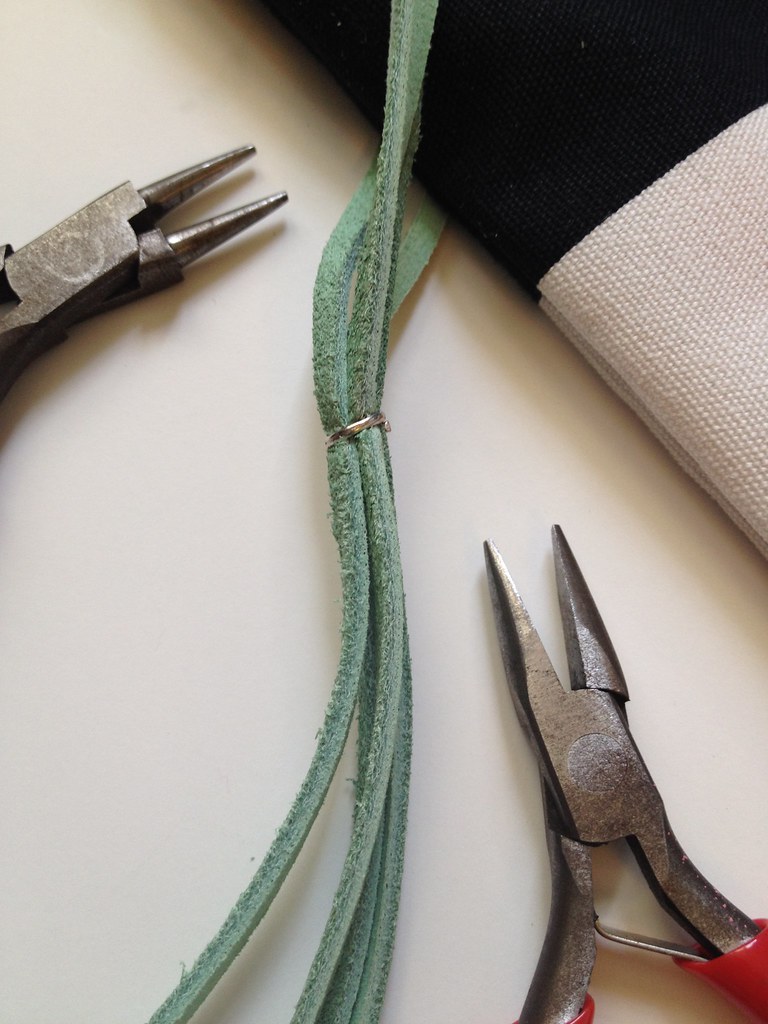
On each side of the bag, thread 2 of the leather laces through the grommets you installed earlier. Join them together using a small metal jewelry jump ring. Separate the ring with a set of pliers, place it around the two laces, and squeeze it tight around the leather. Repeat on the other side.
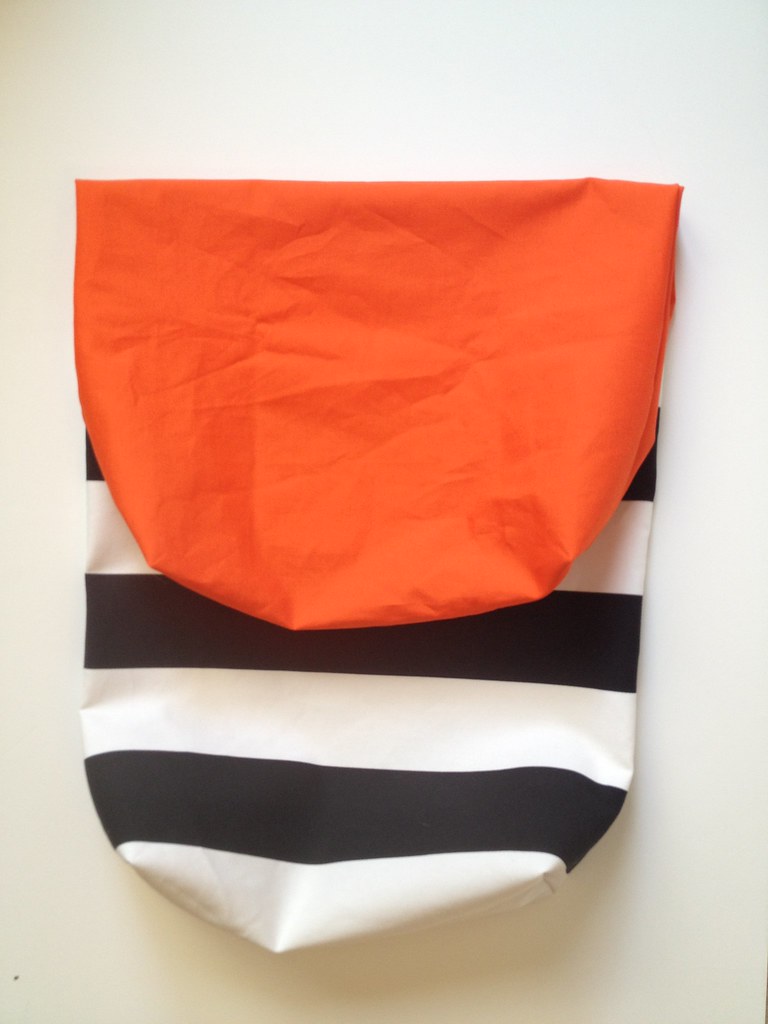
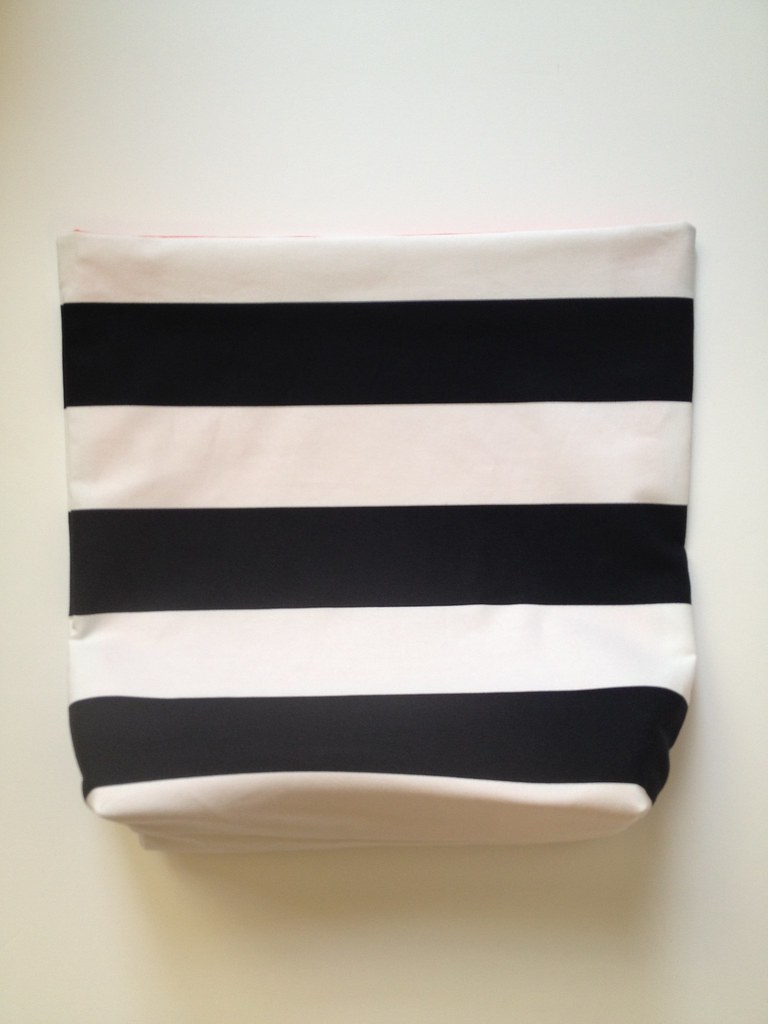
Now, your bag is complete!


I just can’t believe that I CAN DO this:)
[…] and sew a stripes + color tote from Prudent […]
Its getting closer to summer and I’m really wanting to make this bag. Can you provide the source or name of the black and white fabric you used please? thank you! love your blog!
[…] Stripes & Color Tote Bag – Prudent Baby […]
No matter if some one searches for his vital thing, thus he/she
desires to be available that in detail, therefore that thing is maintained over here.
I need to to thank yoou for this excellkent read!! I certainly loved every bit
of it. I have you bookmarked to check out new things you
post…
[…] either in your home or wardrobe! Enjoy. Distressed Striped Wall Letter @ Lolly Jane DIY Striped Tote @ Prudent Baby DIY Striped Towel Hooks @ Landee See Landee […]
[…] Who wouldn’t like this adorable tote, especially on a bright, sunny day? I know I’m totally smitten with this tote, I’d wear it anytime, anywhere. It looks advanced but truth is, the pattern is very simple and the result is quite spectacular. Get the free tote pattern at Pretty Prudent. […]
[…] the Striped tote bag pattern over here and then go make yourself a gorgeous, bright tote […]