


There has definitely been a sewing bug going around the Pretty Prudent craft studios lately. I think it’s partly because of Jaime’s awesome new Fabricworm fabric, as well as the summer sunshine. When we saw this sewing tutorial for the summer frock on Very Homemade we asked Amber if she would pretty please share it with our readers. She said, yes!
Today Amber will walk you through the steps for how to create your own pattern for the dress and how to add the gathered neckline. How cute would this look with a pair of dyed saltwater flats and a Big Texas Hair Bow?
There is something for you and the boys too. Check out Amber’s Little Man Tie Tutorial, and the Gathered Skirt with Exposed Zipper and
DIY Anthropology Tee for you.
Learn how to make the DIY Summer Frock With Gathered Neckline after the jump…
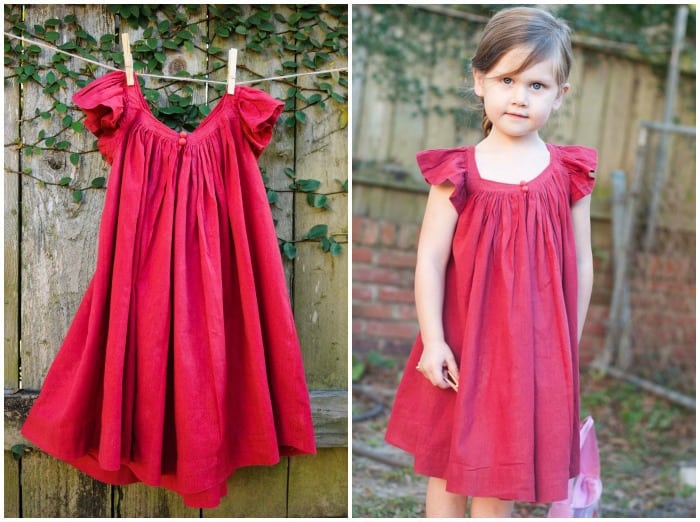
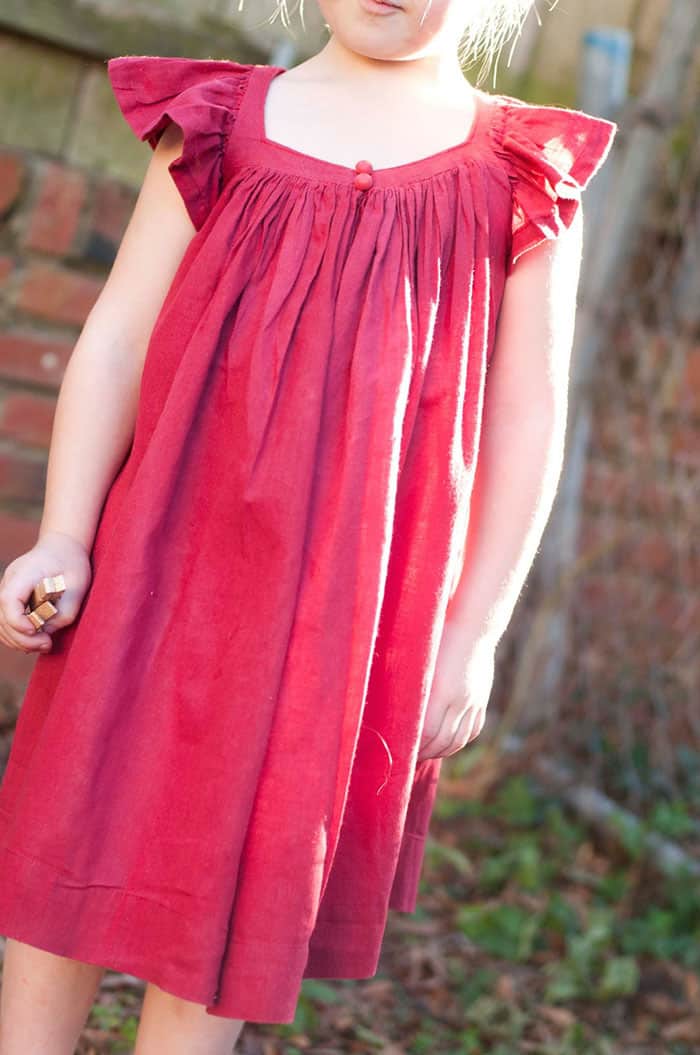
Remember this little Valentine’s Day frock? My little one has worn this dress 6 out of the 7 days that the dress has existed. She absolutely LOVES it (which I cannot say that about everything I sew for her). Because of that I’m thrilled, thrilled, thrilled! This dress is feminine, without being overly so, and oh so fun for the little one to twirl in. It’s perfect for parties or play alike.
As promised, here’s the tutorial on creating a version of this little number.
Ready to make your own?
Here’s what you need:
- Lightweight cotton fabric. The amount depends on the size you are making. For my almost 4 year old daughter I used 2 yards of fabric. (I suggest using a lightweight fabric (shirting fabric, a light linen, or something else that is super light over a quilting cotton because their are lots of gathers on the neckline, lightweight cotton fabric gathers oh so wonderfully. I used a pair of cotton curtains we had around the house.. so be creative with your materials!)
- Iron on interfacing
- Piece of newspaper, typing paper, etc to draft a bodice piece
- Ruler (preferably a clear one like the one pictured below)
- Marking pen
- Fabric pen
- A ready to wear dress that fits your little one well
- Sewing supplies: sewing machine, matching thread, hand needle, scissors, and an iron
- Optional: 2-4 buttons for added detail
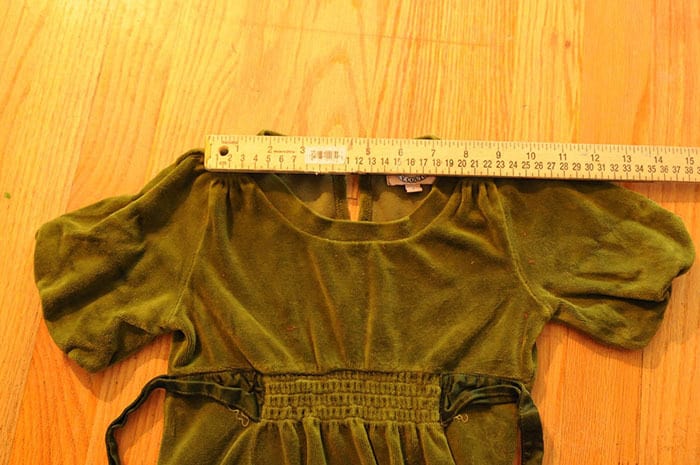
First things first, let’s draft a pattern for the bodice. To do that you will need a shirt that fits your little one well.
A. Using your little one’s ready to wear dress, measure from shoulder to shoulder. Undercut that number just a tad, by like 1/2 of an inch or so so the dress won’t fall off your little one’s shoulders. : ) Jot that number down. This will be referred to as the shoulder to shoulder length from here on out.
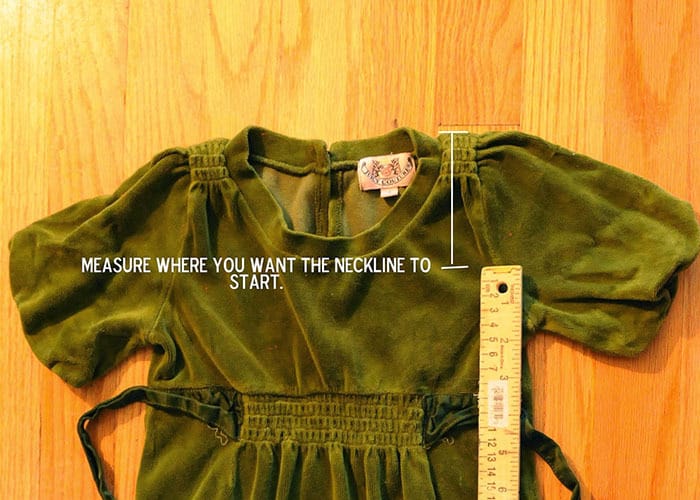
B. Next, decide how deep you want the neckline to be. I wanted my finished neckline to start 3 inches from the shoulder. This measurement will be referred to as the the starting measurement.
C. You will also want to decide how thick you want the bodice of the dress to be. (Just for clarification, when I say bodice, I’m referring to the the narrow squared neckline of the Valentine’s Frock, see below.)
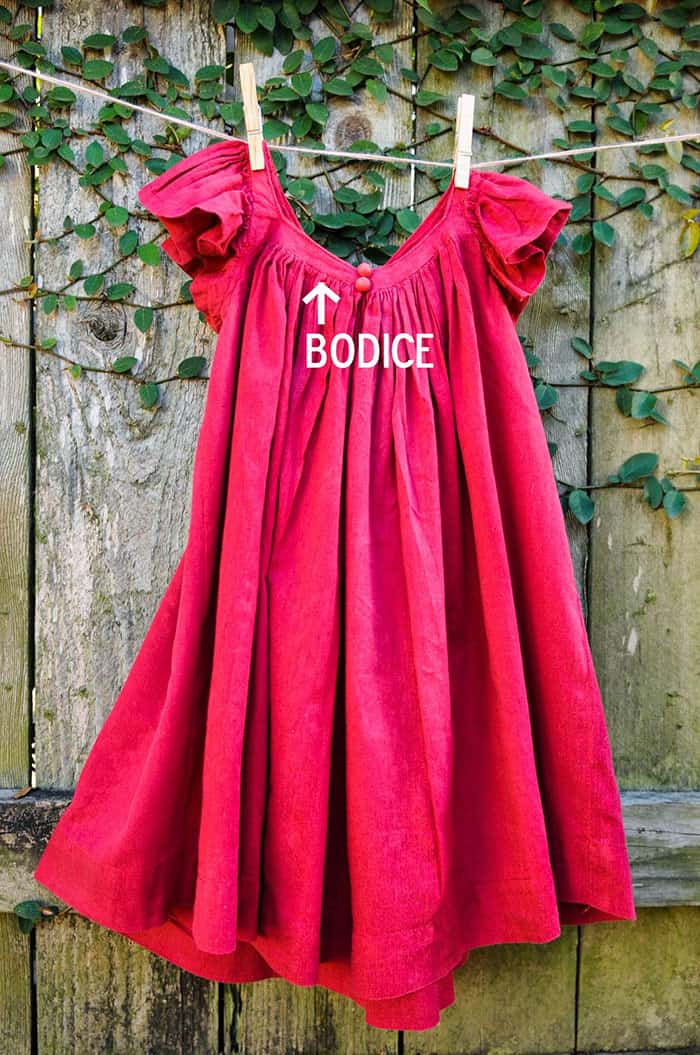
I decided I wanted my finished bodice to be 1 inch wide (I wanted a narrow bodice- feel free to make the bodice thicker if you prefer). This measurement will be referred to as the bodice width.
D. Add the bodice width measurement (from step C) to the starting measurement (from step B). Jot that number down. This will be referred to as the neckline length measurement
starting measurement + bodice width measurement = neckline length measurement
For example, I had a bodice width measurement of 1 inch. My starting measurement was 3 inches. I added those two measurements together (1” + 3″) to get my neckline length measurement. Clear as mud, right? ; )
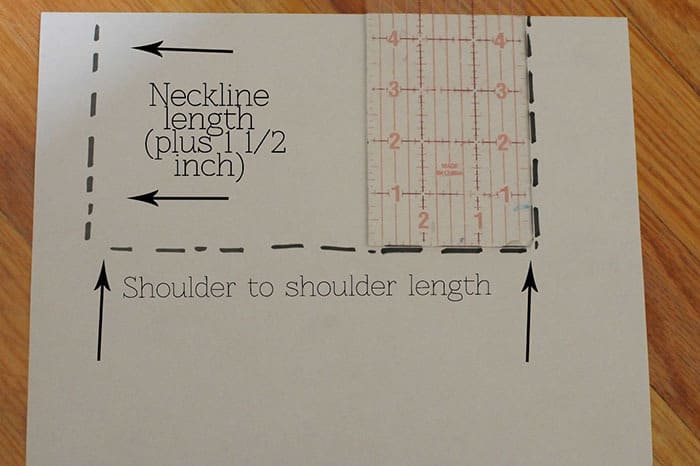
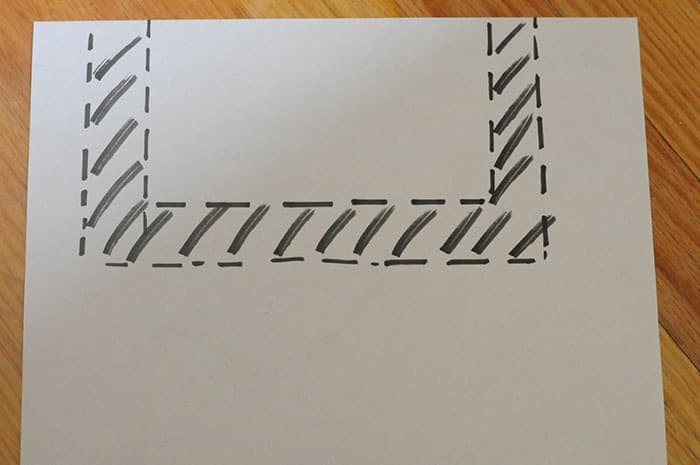
E. Time to draw out your bodice pattern piece. This is where a clear ruler comes in handy! Take your shoulder to shoulder measurement and mark that on the top of your paper.
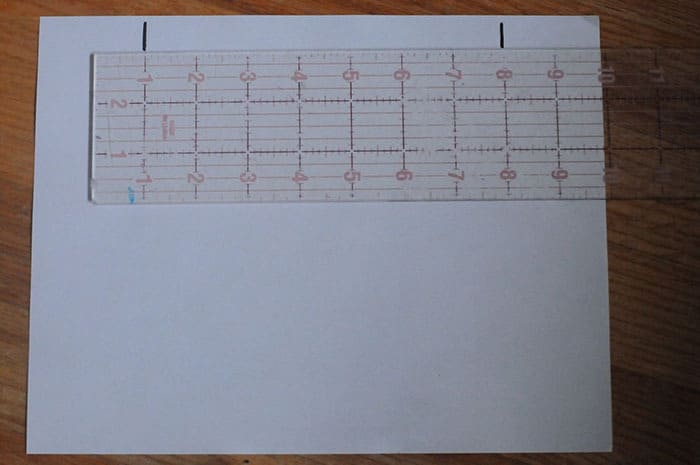
Now, take your neckline length measurement (from step D) and continue your line.
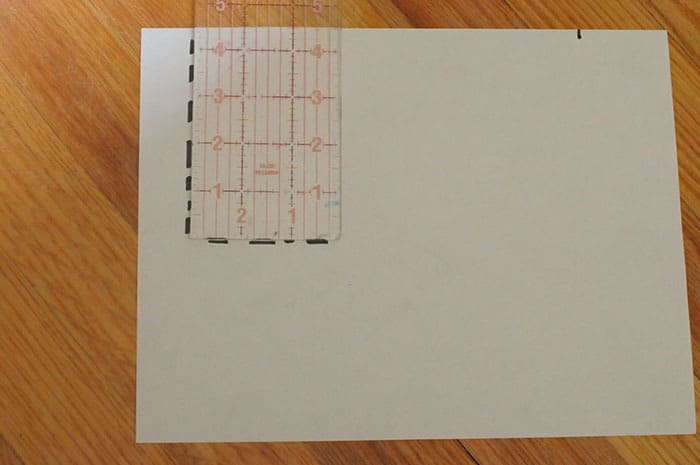
Continue drawing your rectangle until it looks like the one below. This is your base rectangle.
Now draw another rectangle that is 1 inch smaller than the base rectangle.
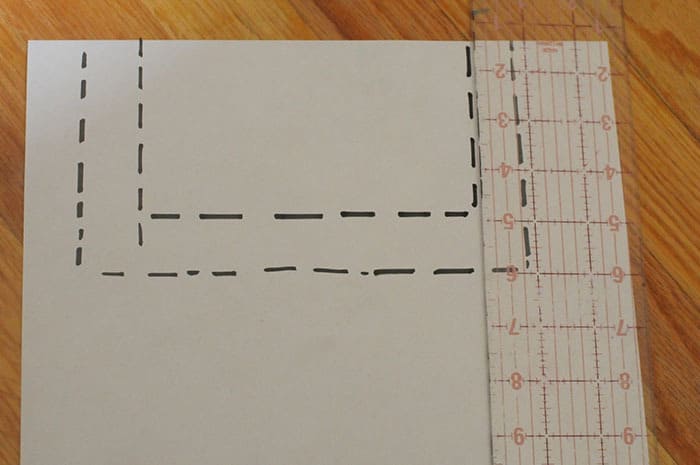
This will be your sewing lines and will become the finished size of your bodice piece.
****** Now, here’s an amazingly helpful hint, that I beg of you to use. ; ) ******
Since this dress doesn’t have buttons or zippers, it should fit right over your little one’s head without falling off her shoulders. I strongly suggest you trace the small rectangle onto two sheets of paper and cut it out to make a mock neckline out of paper. Tape the shoulder seams using 1/2 inch “seam allowance” and see if it will easily slip over your little one’s head without falling off her shoulders. If the paper one fits nicely.. continue on.. If the neckline is too low, or too high or the shoulders are too narrow or too wide, take note and adjust where needed. I skipped this step and ended up having to make some less-than-ideal alterations after the dress was completed. You, my friend can avoid all this!
*************************Don’t tell me I didn’t warn you! ; ) **************************
F. Now it’s time to add seam allowances. Draw a rectangle 5/8 of an inch smaller than the inside of your neckline.
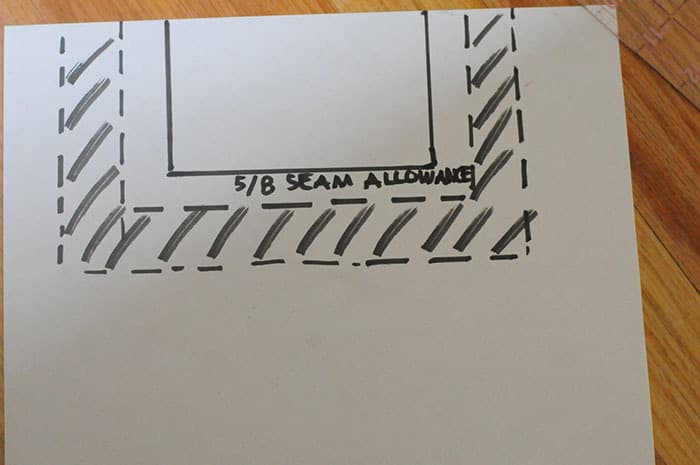
Next, draw a rectangle 5/8 of an inch larger than the outside of the rectangle.
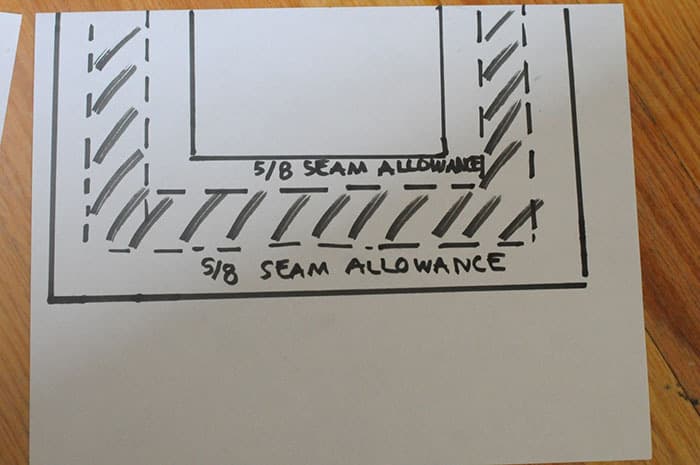
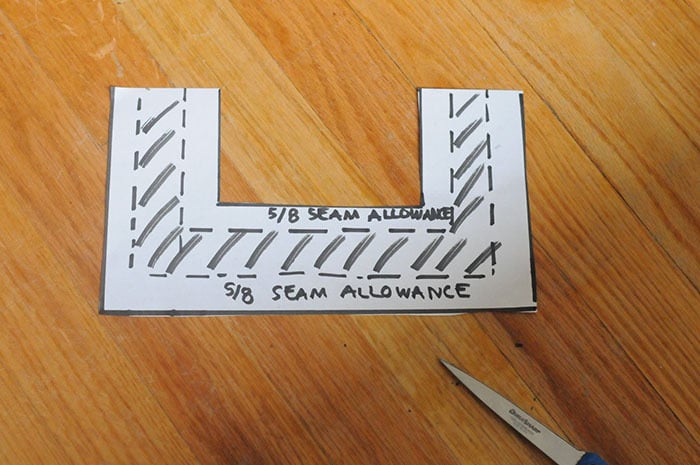
Cut your bodice pattern piece out.
G. Now, let’s get the dimensions for the skirt.
Skirt Width: Take your shoulder to shoulder measurement from above and multiply that by 2.5 or 3. If you have a very lightweight fabric (which I did) I would multiply it by 3; if not, go with 2.5.
Skirt Width = Shoulder to Shoulder length x 2.5 (or 3)
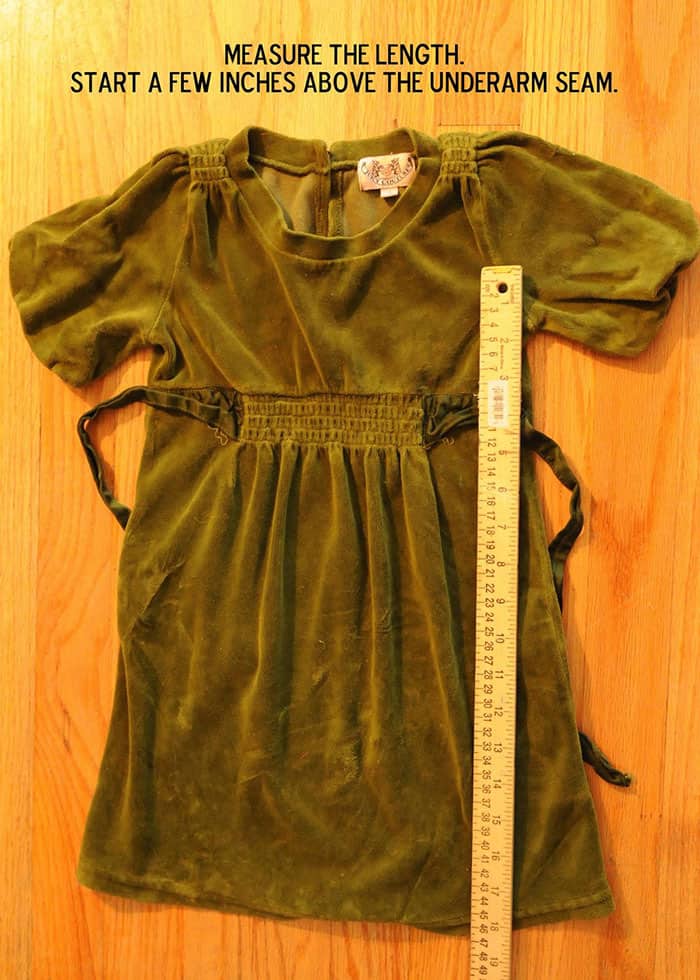
Skirt Length: Decide how long you want your dress. I used my ready to wear dress as a guide and measured it’s length. I started to measure an inch below the neckline and a few inches above the underarm seam. Don’t forget to add an extra 1 1/2 inch for the hemline! Honestly, you really don’t have to be too precise. When in doubt, add a few extra inches just to be sure you don’t make the dress too short. : ) My length measurement was 21 inches for anyone interested.
Skirt Length= Desired length + 1.5″ for hemline
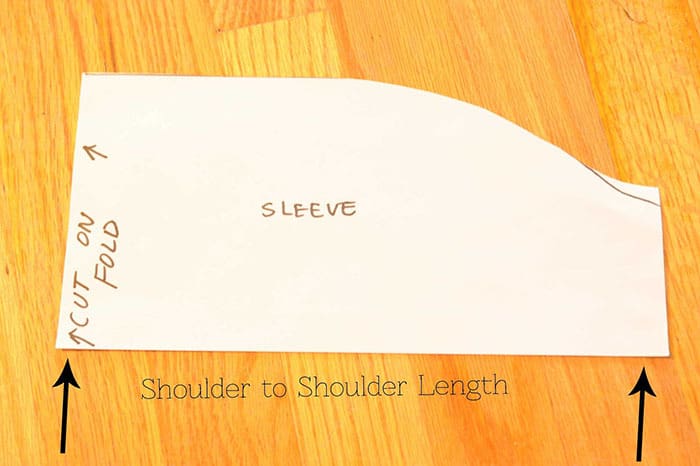
H. Now, let’s draft a sleeve. Sorry I’m not going to be too precise on this; if you get the basic shape, then you’re sleeve should turn out just fine! Your sleeve pattern should be shaped somewhat like the photo below.Here’s a tip on what will be the circumference of your sleeve, to get a fluttery sleeve like the one on my red dress, take your shoulder to shoulder measurement and multiply it by 2. If you want it even more fluttery, multiply it by more. For a less fluttered sleeve, make it smaller.
For the sleeve length decide how long you want the sleeve and add 5/8” on both ends of the sleeve for seam allowances.
Hooray! The hard part is done!!! : )Time to cut and sew.
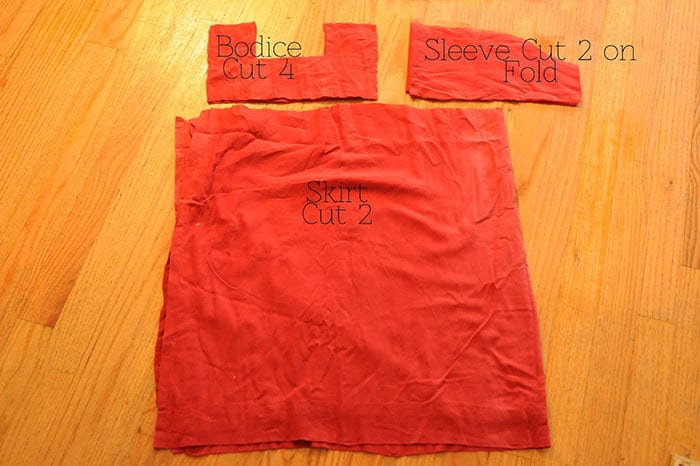
1. First, go cut out those pieces from your fabric.
Here’s what you will need:
Bodice: Cut 4 from your fabric and 2 from your iron on interfacing.
Skirt: Cut 2
Sleeves: Cut 2 on fold.
Not pictured below is that you will also need to cut out your two bodice pieces from your interfacing.
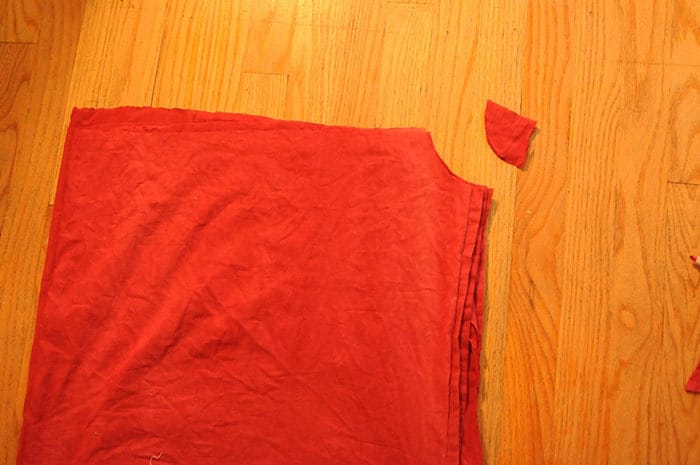
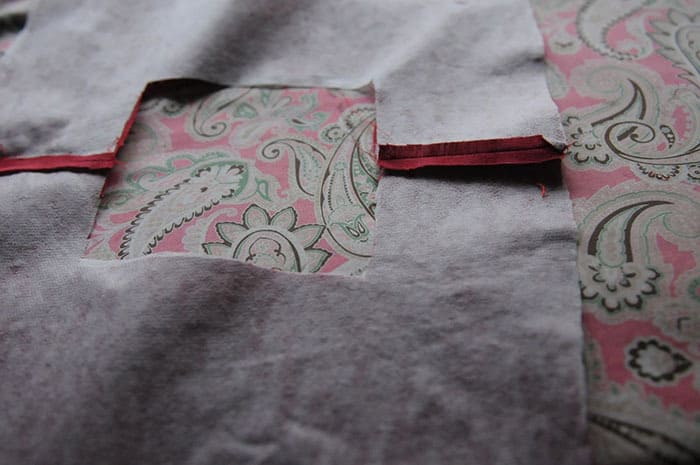
2. Before you start sewing, you will need to cut out the arm holes from the skirt piece. With your skirt pieces folded over width wise, cut out a small 1/4 of a circle on your skirt piece. The arm hole does not need to be as large as a normal arm hole, because the bodice will serve as a portion of the arm hole as well (Not sure if that makes sense, email if you have questions!!). You can use a bowl or something else round as a reference. Again, I just winged it on dimensions and it came out great. ; )
3. Iron on your interfacing to two of your bodice pieces. Sew the shoulder seams of those bodice pieces together using 1/2″ seam allowance . Now sew the shoulder seam for the other two bodice pieces (this second piece will be the lining and we will use this later).
**********Note, from here on out, use 5/8″ seam allowance.**********

Trim the seam allowances and iron them flat. Don’t be tempted to skip the ironing; ironing is key to good sewing, in my opinion! : )
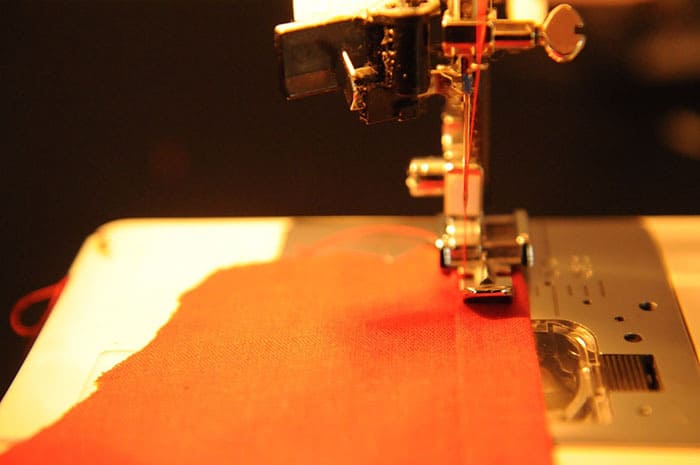
4. Now, sew your two sides of your skirt pieces together. For a clean finish, use a french seam to hide all the ugly raw edges.
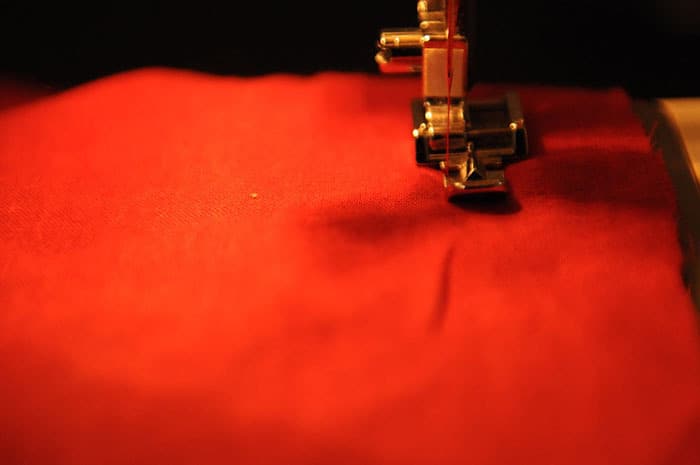
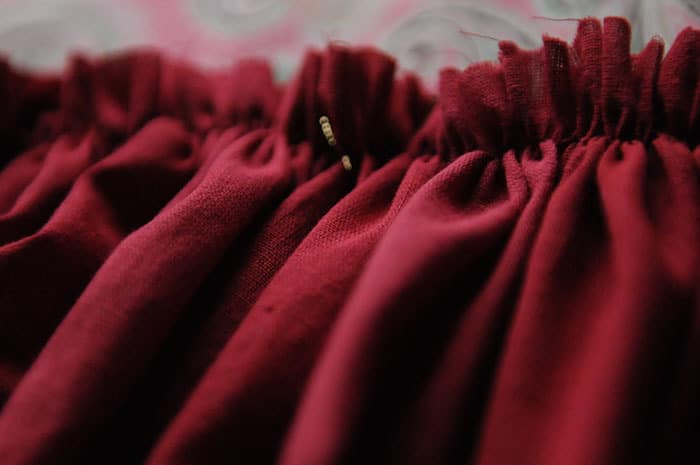
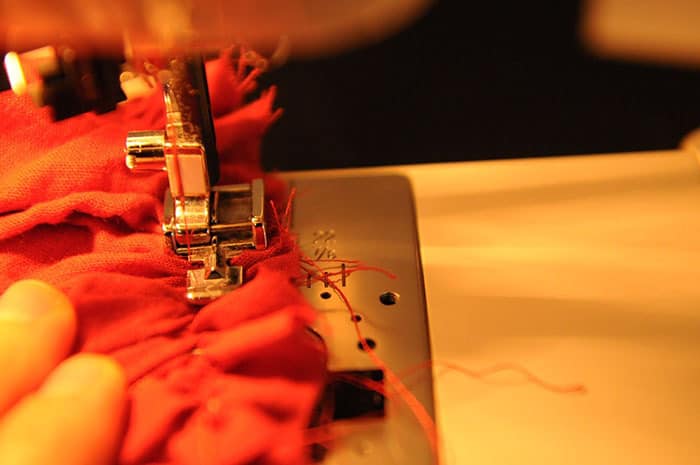
5. Next, we’ll gather your skirt. Before you start to gather, mark the mid point of both the front and back of your skirt, this will be a useful guide later. Using a long machine stitch gather your skirt. For great tips on how to gather, check out Dana from Made’s instructions. I used the cheating method.
6. Now, with right sides together, pin your skirt onto your bodice piece that has interfacing on it.
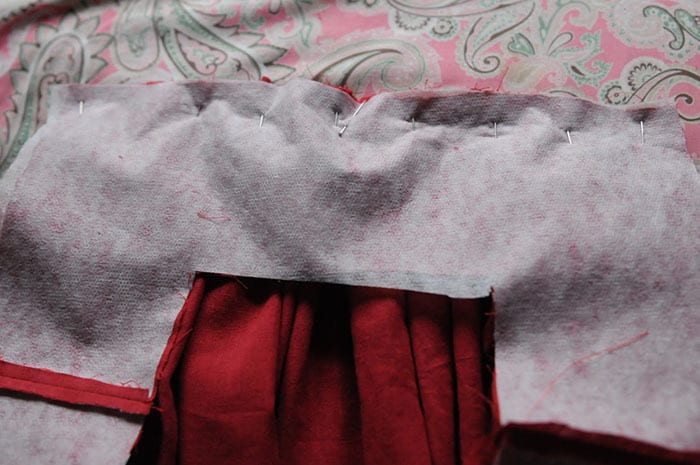
Sew the skirt onto the bodice piece using a 5/8” seam allowance. Tip for good gathers, gently flatten the gathers as you sew. You will now have a lovely dress with no sleeves. Here’s where you may want to try the dress on your little one to be sure the neckline is not too low. Adjust the shoulder seams if needed.
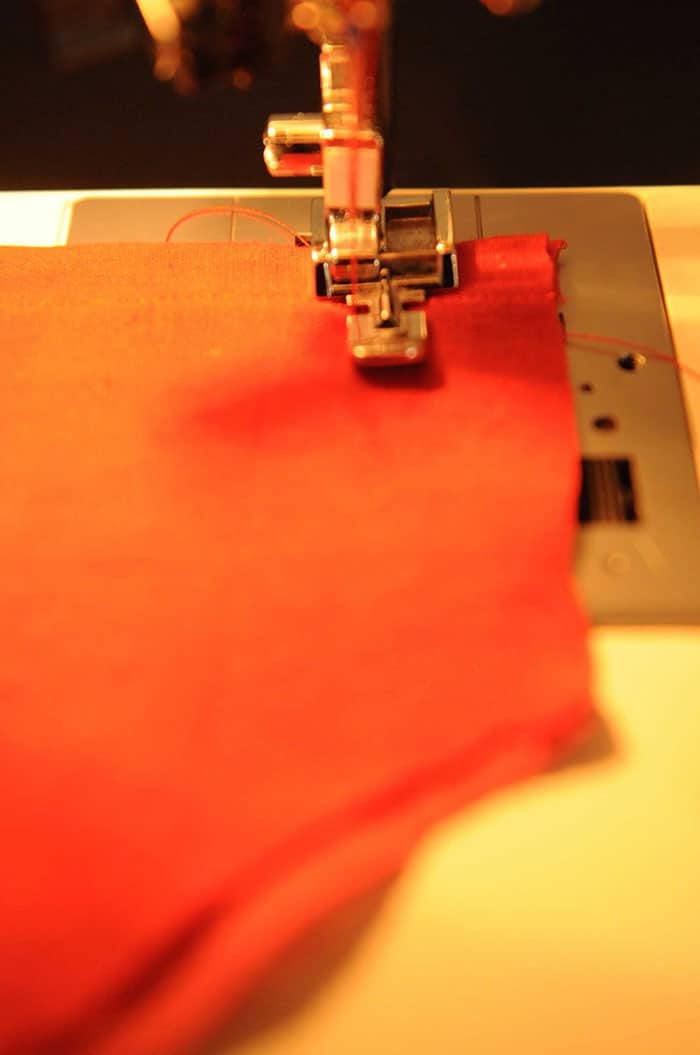
7. Time to make the sleeves. Take your sleeves and hem the long straight edge. To hem, fold up 1/4 of an inch along the long straight edge of your sleeve. Iron. Now fold the edge 1/2”. Iron. Sew the hem in place.
8. Now, with right sides together, line up the two short straight edges of one sleeve together. Sew in place; this is your underarm seam. Do this for both sleeves. You should now have two sleeves that look like huge circles.
9. Next, we’ll gather the sleeve. Mark the mid point of the sleeve. Starting and ending about an inch away from your underarm seam, sew a gathering stitch along the curved edge of your sleeve using 5/8” seam allowance.
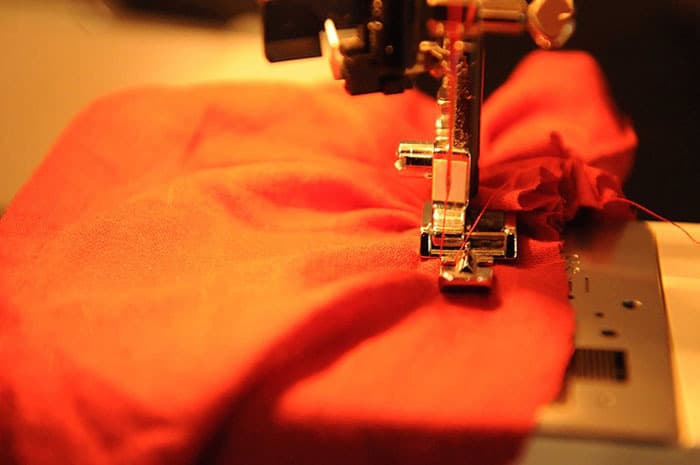
10. Now, we will pin the sleeve to your dress and gather it to fit. To do this, turn your dress inside out and turn your sleeve right side out. Place your sleeve inside your dress so that right sides are together and raw edges are lined up. To ensure that the sleeve will be gathered evenly, you will want to pin (with right sides together) the underarm seam of the sleeve to the side seam of the dress. Next, pin the midpoint of your sleeve (which you marked earlier) to the shoulder seam of your dress. Finally, Pull the gathering strings on the sleeve to fit the arm hole. Now pin the heck out of this!
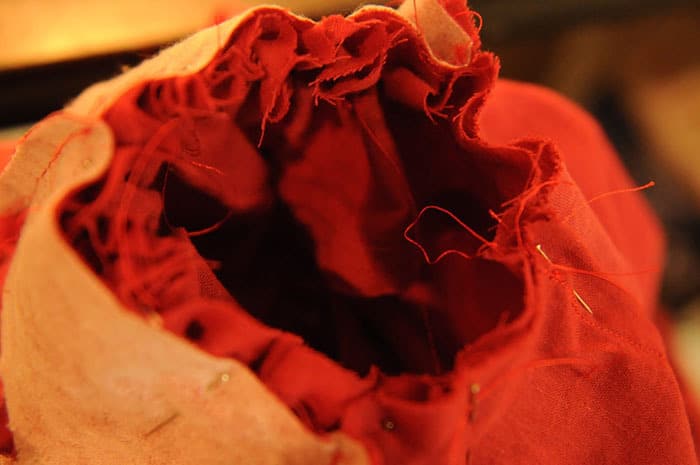
11. Sew the sleeve in place, being careful to make your gathers nice and smooth.
See the photo below for what your dress should look like at this point…
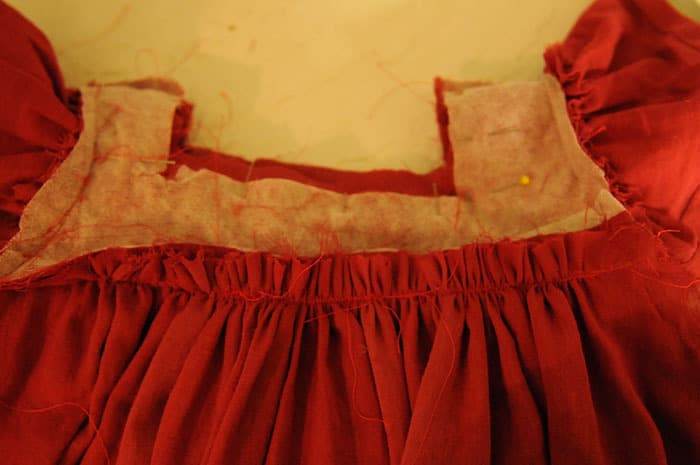
12. Now it’s time to sew in the lining to the dress along the neckline. Remember that second bodice piece we sewed the shoulder seams on a while back? We will use this now for the lining.
I apologize in advance for not getting a photo of this next step, but believe me this will make the last step of hand sewing the lining closed much easier! take your lining piece and fold the raw edges of the outer edge under 5/8”. You will thank me later!
13. With right sides together, pin the inner edge of the lining piece to the dress bodice along the neckline, lining up all raw edges and shoulder seams. Sew the lining to the dress along the neckline using a 5/8” seam allowance (see the black lines below), turning the dress at the corners for a sharp edge.
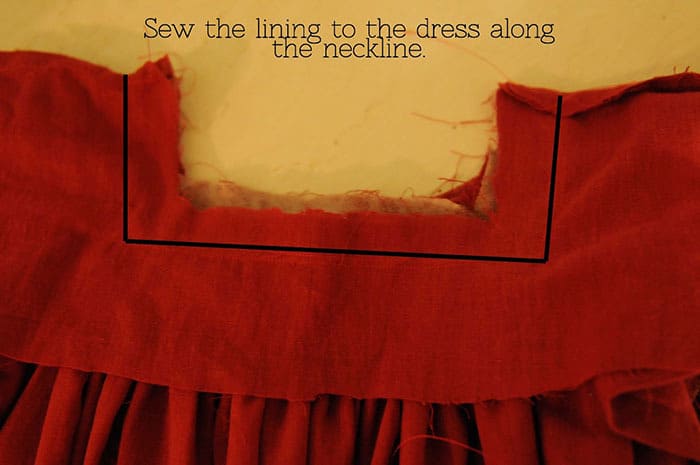
Trim the seam allowances, clip the corners and iron the lining towards the inside of the dress. Pin the lining down.
Below is what your dress will look like right side out. You’re almost done!
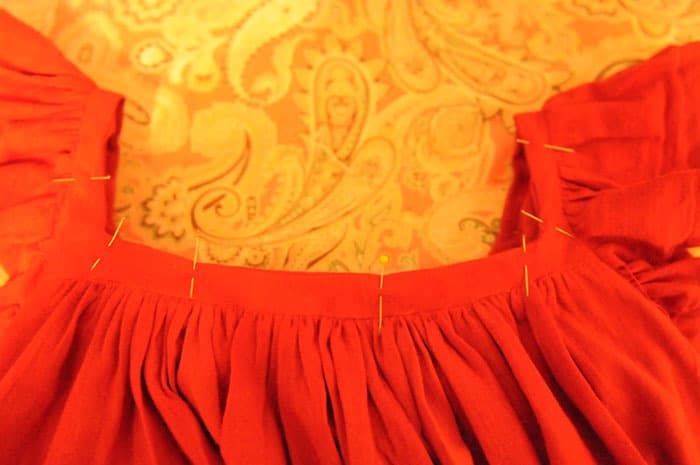
14. Here’s where ironing the seam allowance of your lining piece comes in handy…using a needle and thread, hand sew the lining to the inside of the dress using a blind stitch. This will close up your lining and make your dress look all purty.

15. Now hem the bottom of your dress and you are DONE!
This step is optional, but I added two buttons to the front and two buttons to the back for a little added detail.
Loves,
Amber
I love this dress! I am planning on making it today for my granddaughter using an old dress of mine. She loved it when she saw it too. Of course she wanted it in the red, and I didn’t have a red dress or red curtains to use! She is 4 1/2 and all about dresses.
I loved the concept of this dress! I am not a child, but this can work for children at heart, too! I made my first dress like this.. and most certainly won’t be the last! I can already tell that this concept will be a staple in my personal dress-making. >^-^<