


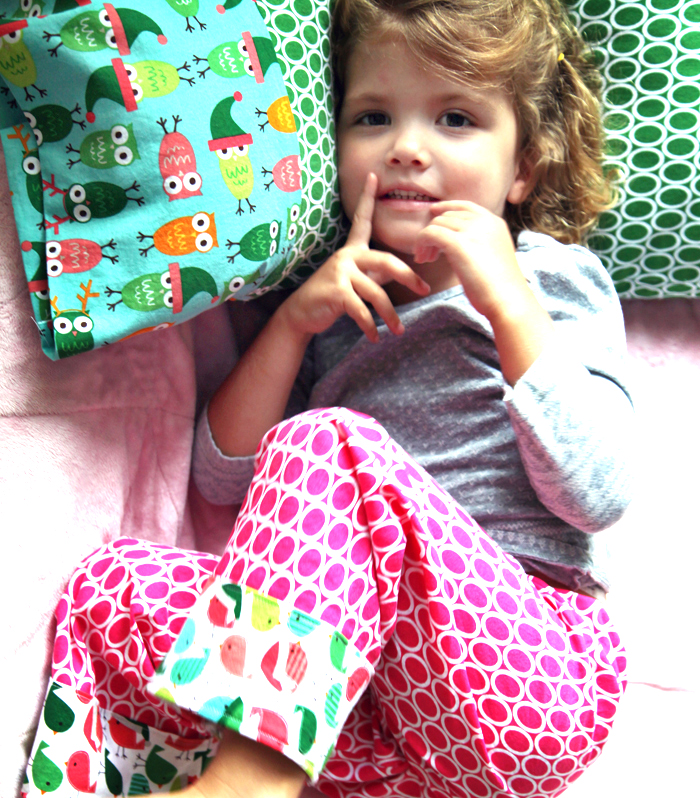
The other day, I was explaining to a non-DIY-type friend that craft stores have their Christmas supplies up so early so that makers can have all their goods ready to sell/gift/hoard in time for the season. So in honor of the early starters here’s a little Christmas in September. I’m going to share my favorite quick pillowcase tutorial. A pillowcase makes a great gift by itself, and like we did here, as wrapping for a coordinating gift like our PJ pants!
 I learned this pillowcase technique a few years ago at QuiltCon when American Patchwork and Quilting was doing their 1 Million Pillowcase Challenge. UPDATE: I just went to the site and it’s still going, so go check it out and make a few extra to donate! Bust that stash for a good cause!
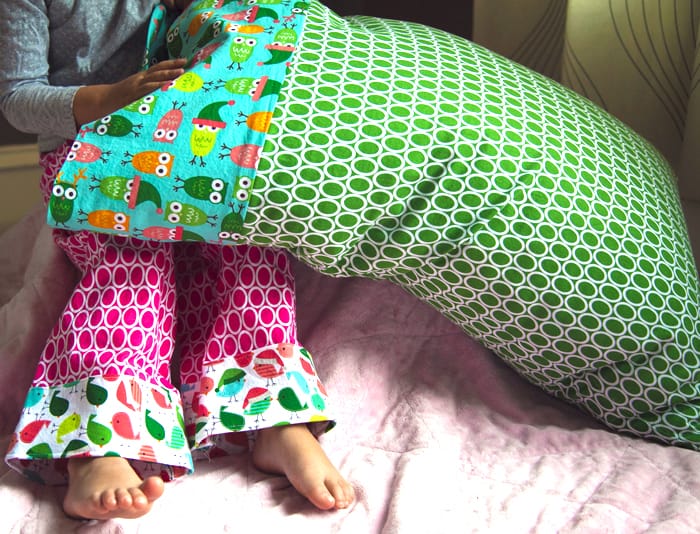
Here’s how to make one!
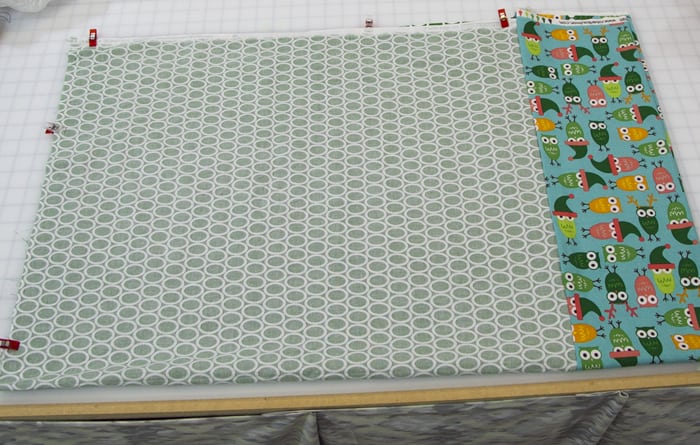
Cut 3/4 yard fabric for the main pillowcase and 1/4 yard of a coordinating fabric for the cuff. If you have longer pillows, adjust the lengths accordingly like we did here for a super long cuff.
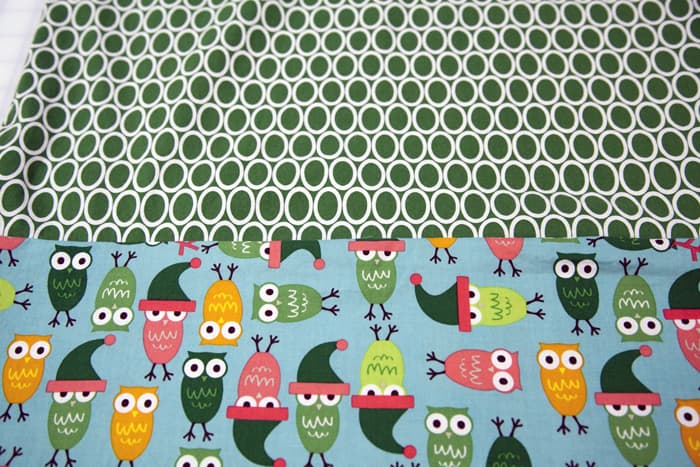
Here are all of the fun and festive holiday fabrics from Fabricworm, like these cute prints we had stashed from Ann Kelle.
1. Lay the cuff fabric down horizontally and right side up.
2. Align the long edge of the main fabric with the bottom long edge of the cuff.
3. Without disturbing the matching edge, roll the main fabric down so that it is “within the cuff.
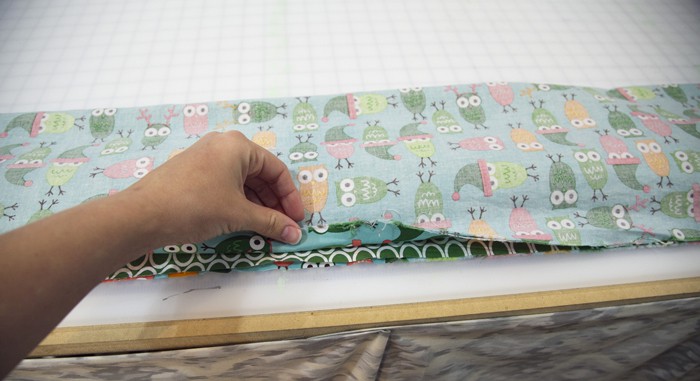
4. Fold the top edge of the cuff over to enclose the main fabric. Pin in place.
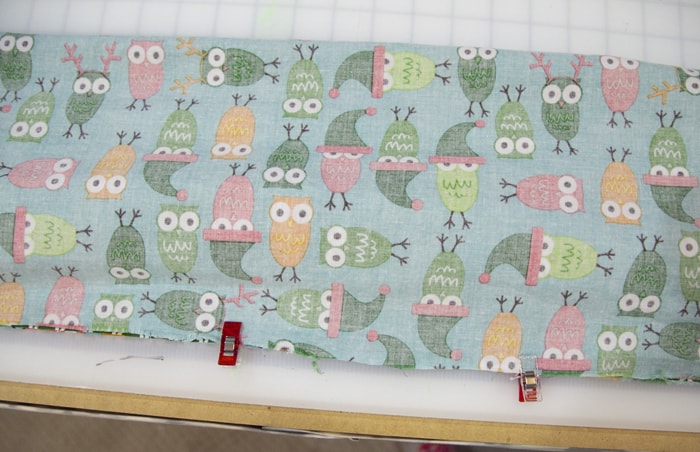
5. Sew through all three layers with 1/4″ seam allowance along edge.
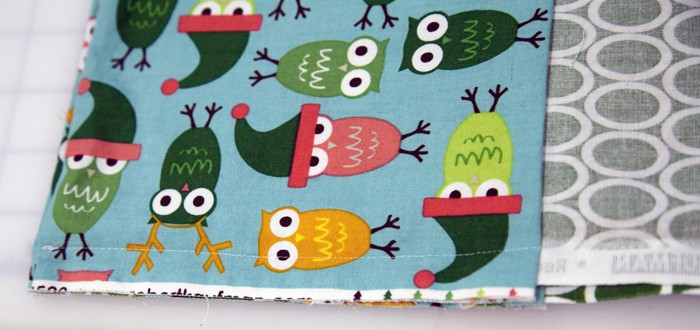
6. Pull the rolled fabric out and turn piece inside out. You will have a completely finished cuff. Cool, right?

7. There are three easy ways to finish the case.
A. Fold in half with right sides facing, aligning top and bottom edges of cuff, and sew down side and across bottom, with back-stitches at beginning and end. This is fast but leaves a raw edge inside.
 B. If you have a serger, finish as described above but with a serged edge for a professional look.
C. Create a french seam by folding the case with wrong sides facing, sew with a scant 1/4″ seam, turn inside out and stitch again with a 3/8″ seam, and turn right side out.
 Sweet dreams!
This is fantastic. I love this. x
Thanks Susan! They are so fun to make. Xoxo
What a fun idea!!!!
I love the elfish owl fabric!
[…] The Easiest & Cutest Pillowcase Ever: Tutorial – 1 freebie(s)? […]
So cute! I need to make some!
[…] The Easiest & Cutest Pillowcase Ever, by Prudent Baby […]
[…] these simple tutorials are perfect for getting your sewing fix. Learn how to make Jacinda’s Easiest and Cutest Pillowcase Ever in just an afternoon. During naptime you can sew up a few of these Simple Swaddle Blanket or […]
Just made 2 tonight with my daughter and a young family friend. We had a blast and they turned out great! Thanks for sharing this tutorial!
Love your pictures for your tutorial pillowcases! My small quilt group has made approximately 175 pillowcases for Sharing & Caring Hands in Minneapolis. It is an amazing place for those less fortunate and has been run by Mary Jo Copeland for over 50 years. The children in the residences love them! It’s a great project and a service that is simple and I strongly recommend that groups everywhere consider finding a place in their area that can use them, perhaps a shelter or nursing home. They can make so many people/ children happy.
http://www.sharingandcaringhands.org/
https://www.facebook.com/SharingandCaringHands/