


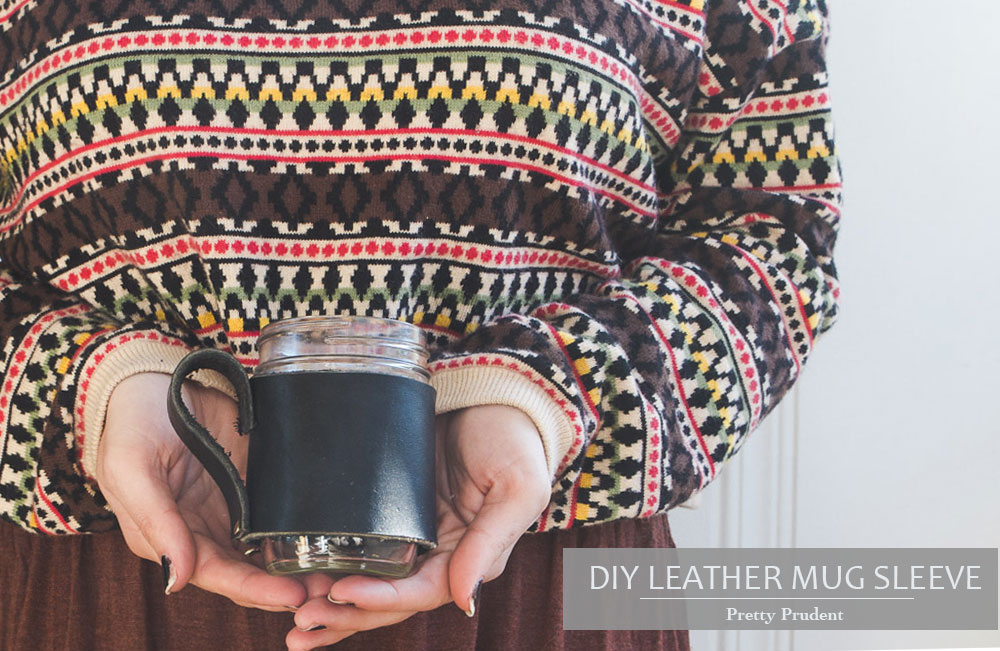
In the fabric district in Downtown Los Angeles there is an awesome leather store called X-Trims and Leathers. I have gone in there a bunch but couldn’t ever figure out what I wanted to make, or where to even begin choosing from their selection. While Jaime, Jacinda, and I were brainstorming projects, Jaime mentioned making a leather mug sleeve for a mason jar. Bingo! I raced over to the leather shop to gather supplies. I’m thrilled with how it turned and have already used it a bunch. This project is perfect for anyone who is just beginning to work with leather, or anyone looking to put scraps of leather to use.

Learn how to make a DIY Leather Mug Sleeve after the jump…
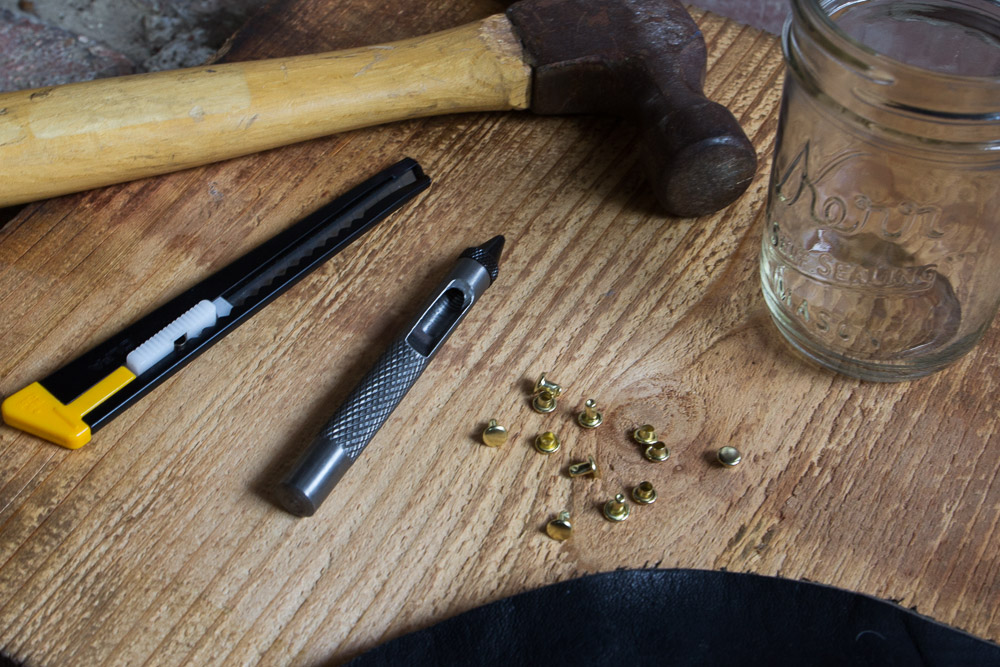
You will need:
– Hammer
– Leather Hole Punch Tool. I picked mine up at X-Trims and Leathers.
– Thick Leather Scrap (you will need about a 1/4 yard)
– 8 0z mason jar
– Ruler
– X-Acto Knife
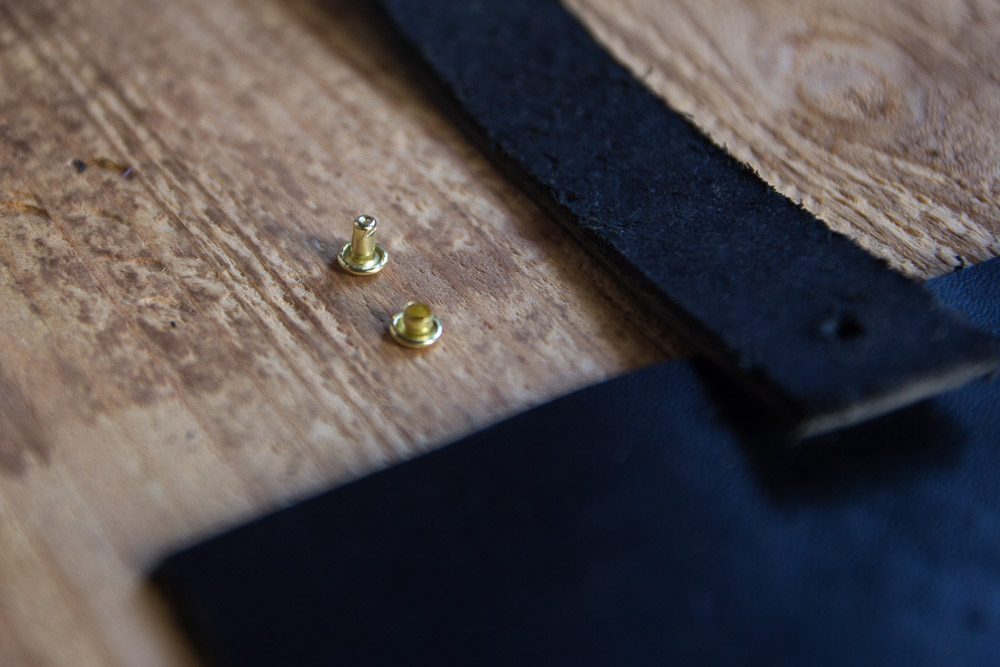
– Small Rivets
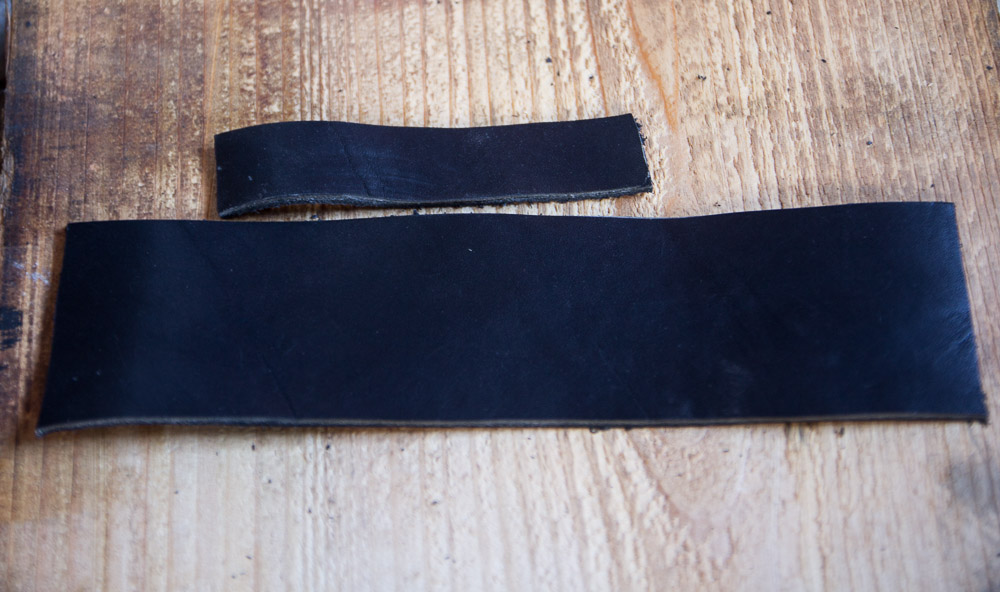
Use an X-Acto knife to cut two pieces of leather.
1st piece (the sleeve): 2.5 x 9.75 inches
2nd piece (the handle): 1 x 4.25 inches
If you would like to make one for a different size jar or cup, just wrap the leather around to measure the length and width. You want the leather to overlap about 1 inch when it is complete.
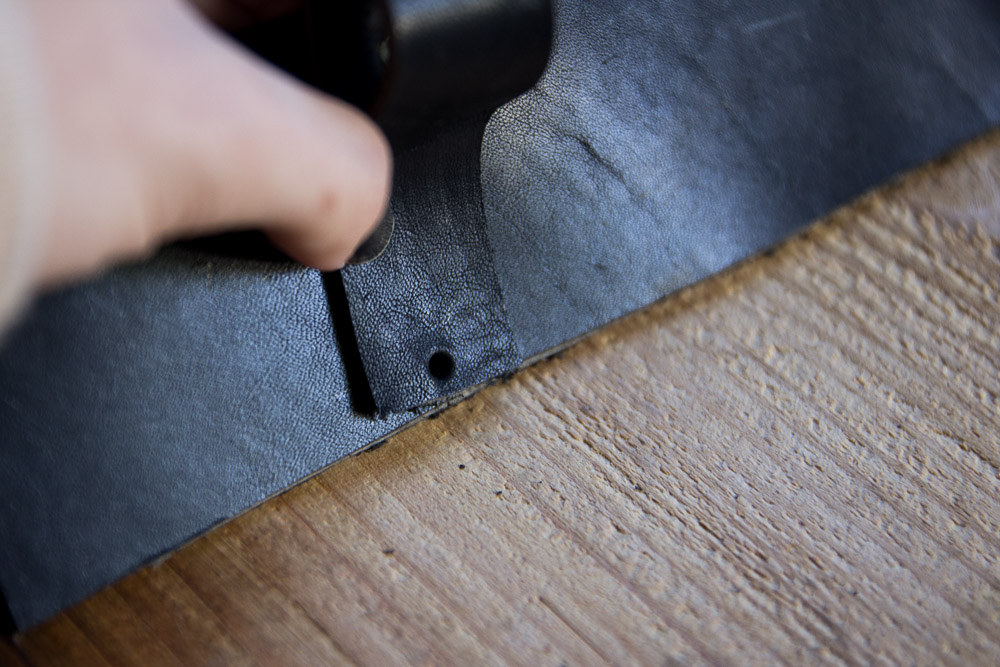
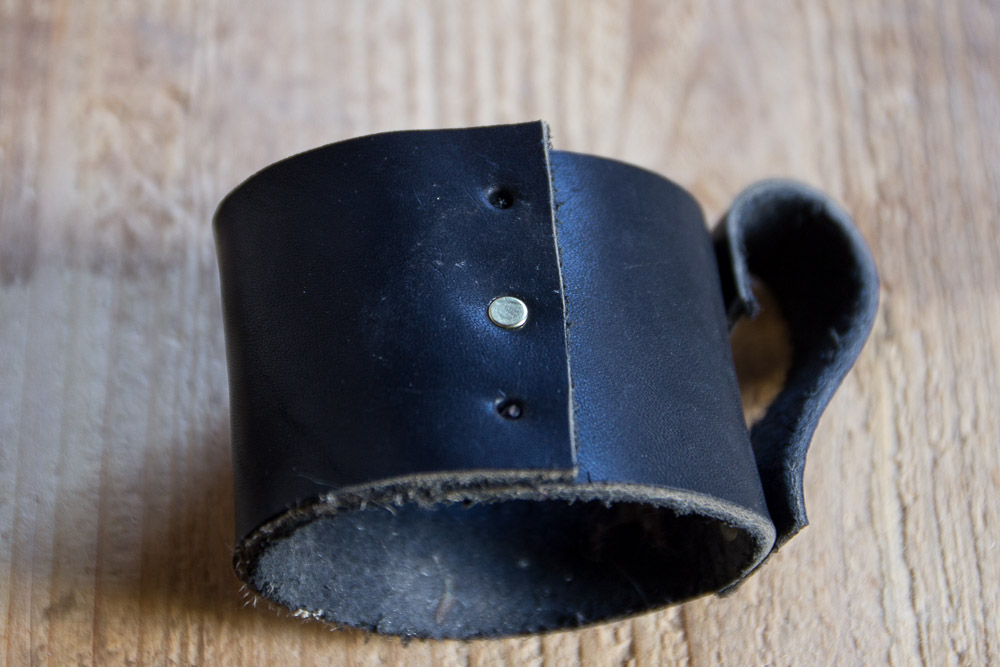
Place the handle in about 2.5 inches from the edge. Make two holes – one in in the sleeve and one in the handle.
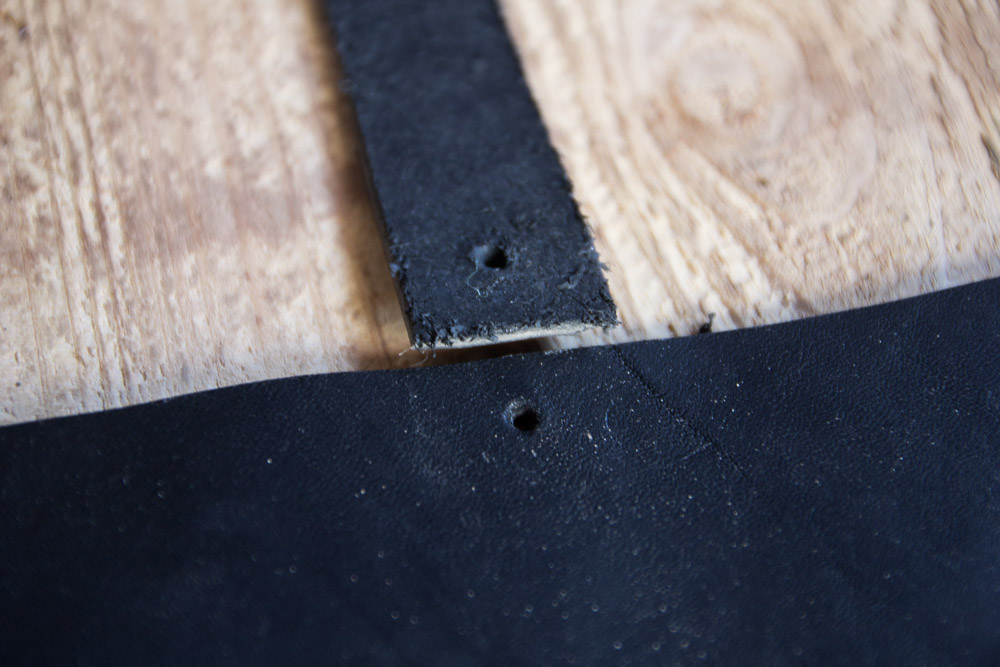
Gather your rivet and line up the holes in the leather. Place the rivet through the hole and make sure it fits nice and snug. Place the cap at the other end of the hole and hammer the rivet in place.
Make sure the hole is not too big or two small, or the rivet won’t fit well. If you are new to working with leather I suggest trying it out on a scrap section of leather first to get the hang of it.
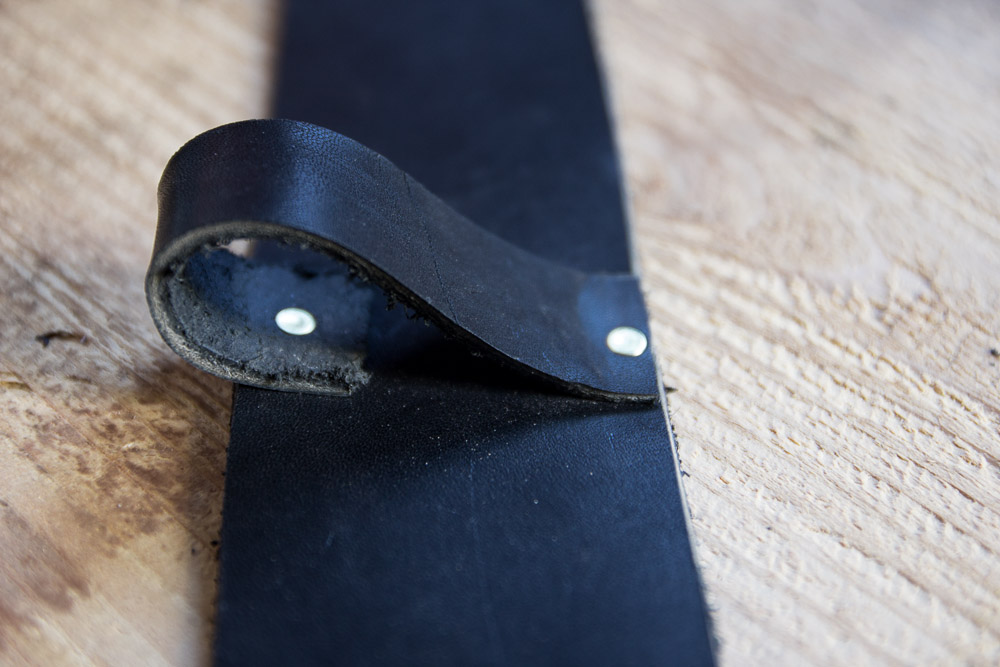
Fold the handle over and make matching holes again in the sleeve and the bottom of the handle.
Secure with a rivet.
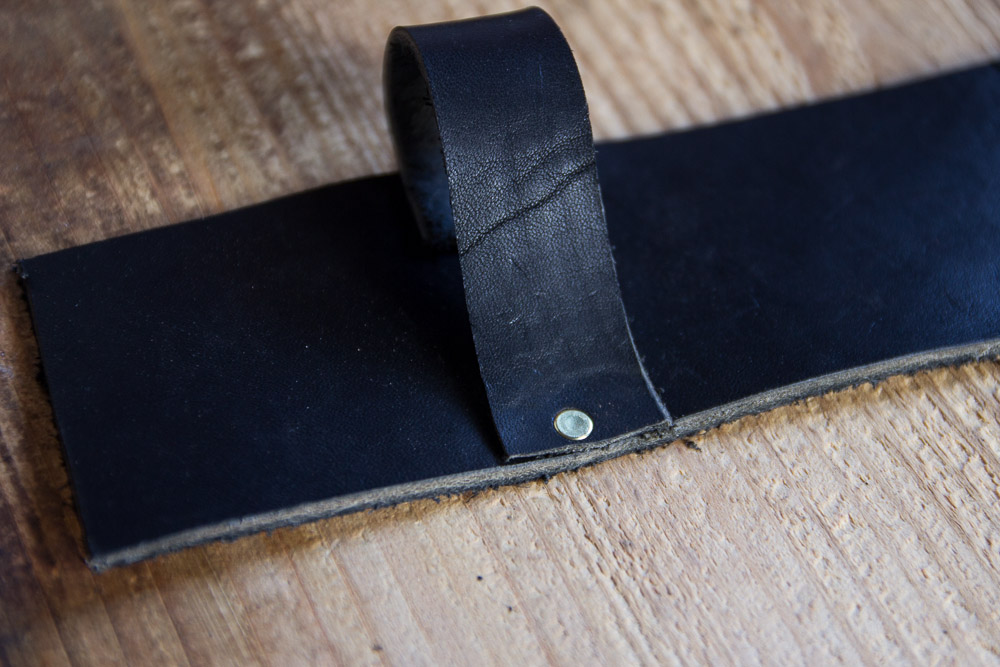
Your handle is complete.
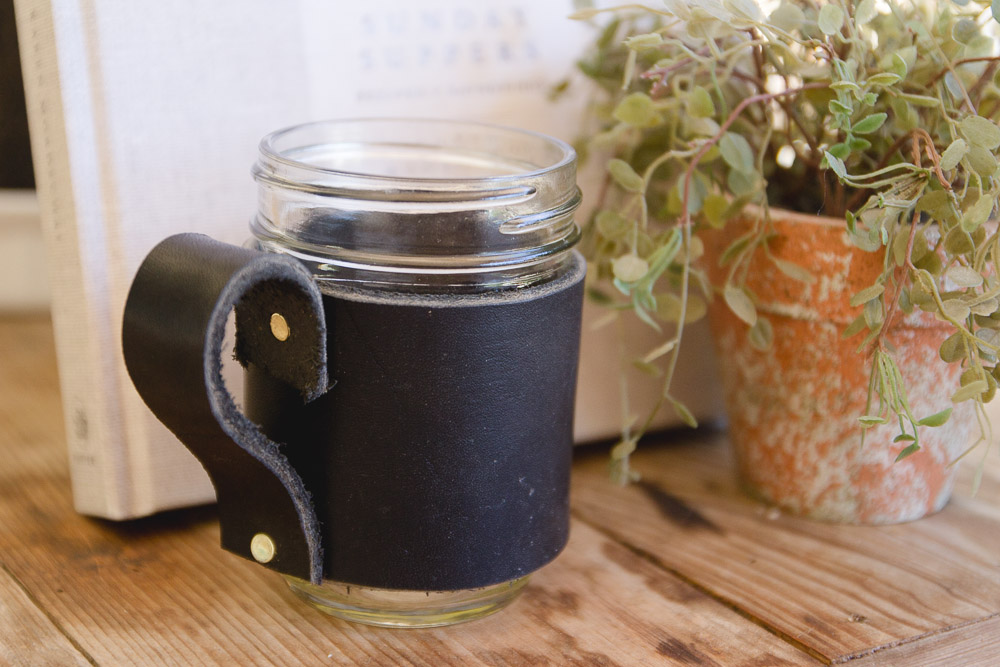
Fold your leather around the mason jar and mark where you want to place your next rivets. You can put two or three in place if you’d like.
Once you’ve marked the places make your holes. If you are using a leather hole punch that requires hammering, fold the leather around a piece of wood and make your holes. You use the piece of wood in the middle so that you don’t damage the leather on the other side.
Place your rivets through the holes and secure.
Slip the cover onto your mason jar.
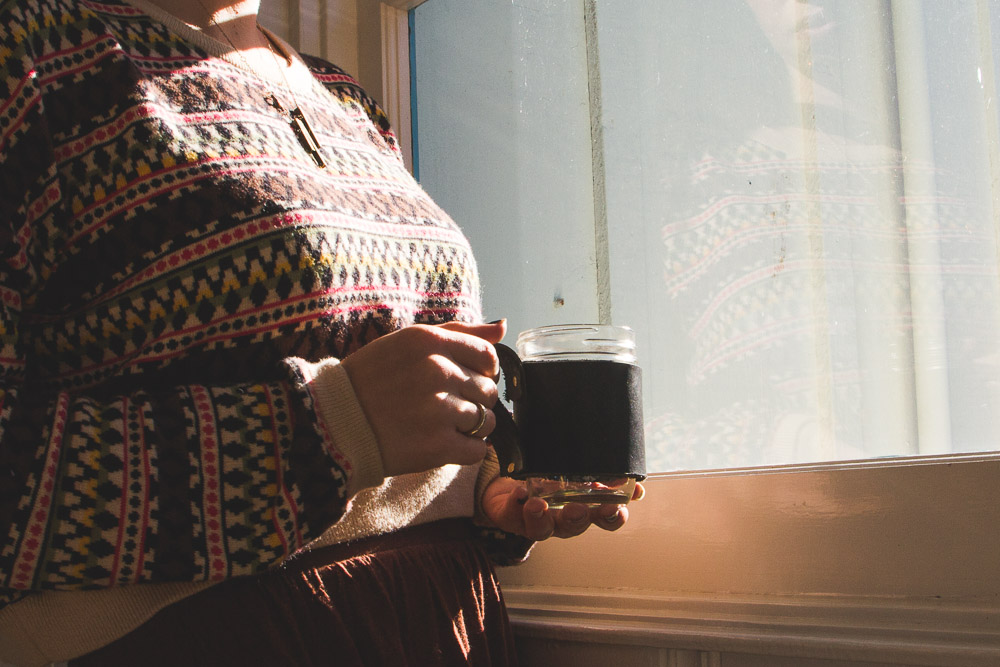
Fill it up with a delicious Irish mule cocktail, iced coffee, or your beverage of choice.
I love this! It’s a great gift idea for guys too. And thanks for the tutorial on riveting. You make it look so easy!
[…] DIY Leather Mug Sleeve – 1 freebie(s)? […]
I want a whole set of these!
[…] have been on quite a leather kick since I made the Leather Mason Jar Mug, and with Valentine’s Day right around the corner, I put my leather scraps to use and made […]
[…] wanted to give it a more modern look, and added leather ties. Notice a theme this past week (ahem, Leather Mason Jar Mug and Leather Heart Keychains)? I adore how it turned out and am now on the hunt for a sweet baby to […]
[…] DIY Leather Mason Jar Mugs I saw one of these somewhere, and I told Colleen we should figure out how to make one. Then while […]